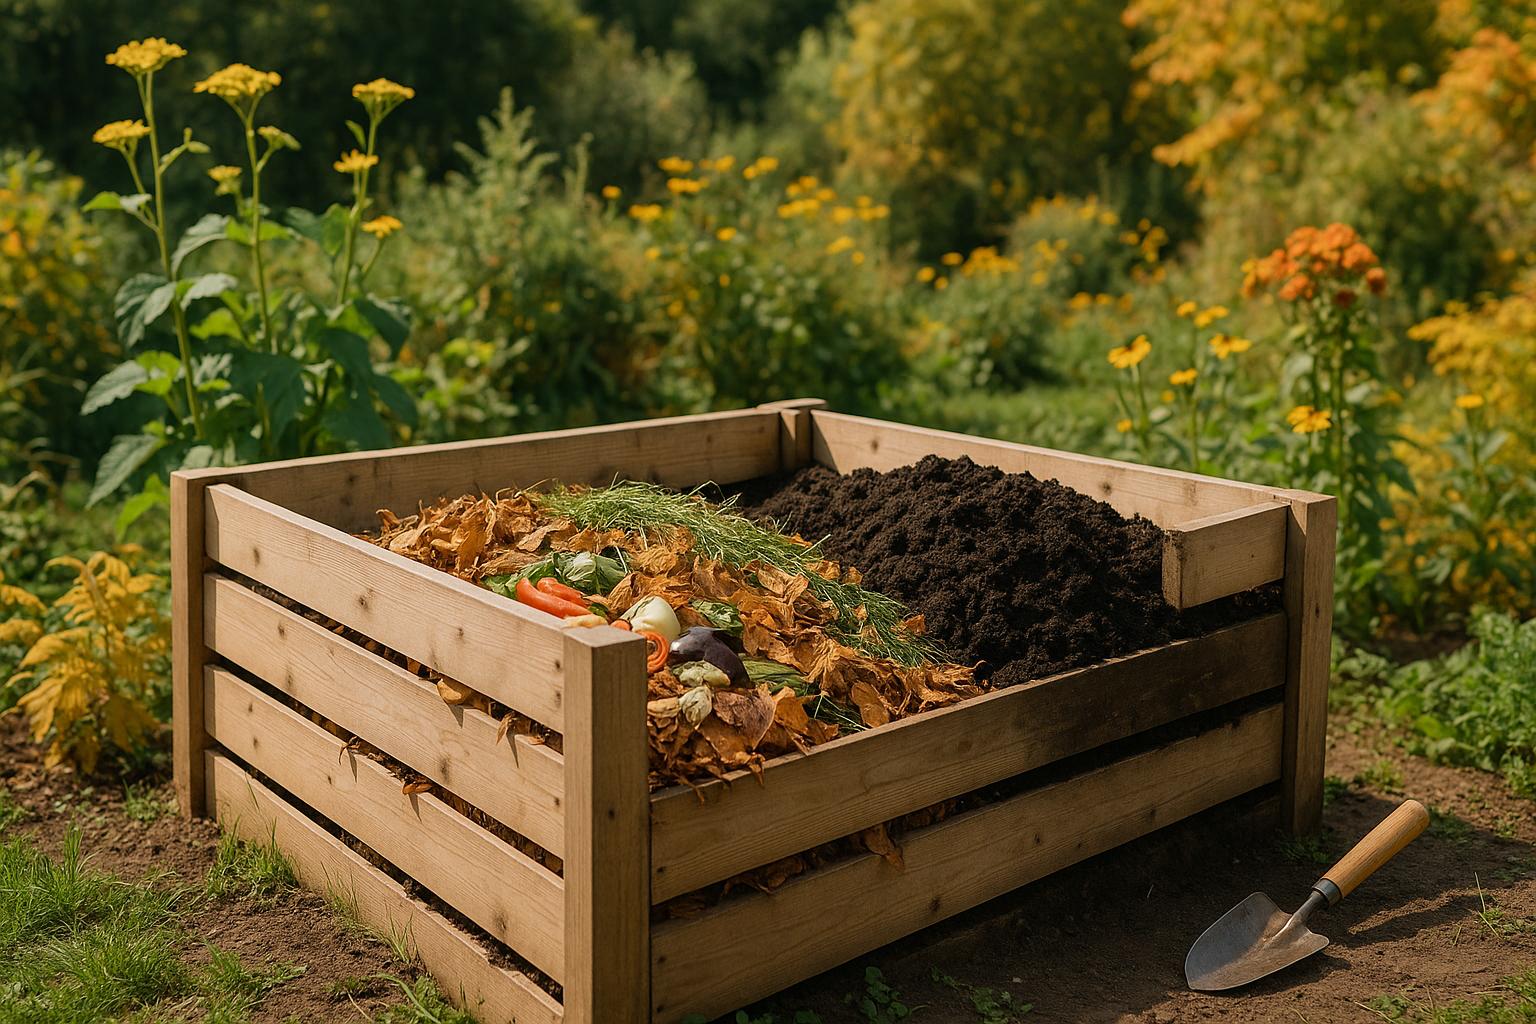
Seasonal composting means adjusting how you compost based on the time of year to keep the process efficient and productive. Here’s what you need to know:
- Spring: Restart your pile by turning it, balancing greens (like grass clippings) with browns (like dried leaves), and reactivating microbes.
- Summer: Manage heat by keeping the pile shaded, moist (like a wrung-out sponge), and well-aerated to prevent overheating and odors.
- Fall: Stockpile carbon-rich materials like shredded leaves to prepare for winter and balance nitrogen-heavy greens.
- Winter: Insulate your pile with straw or tarps to retain heat, turn it less often, and focus on layering materials properly.
Why It Matters
Composting reduces landfill waste and helps fight climate change by cutting methane emissions. Plus, it creates nutrient-rich compost for your garden year-round.
Quick Tip: Always aim for a 2:1 ratio of browns to greens and adjust based on seasonal challenges like moisture or temperature changes. This ensures your compost stays active and effective no matter the season.
Basics of Home Composting: Four Seasons Webinar Series
Spring Composting: Restarting Your Pile
As spring arrives, the rising temperatures and renewed activity in your garden signal the perfect time to wake up your dormant compost pile. With a little care, you can jumpstart decomposition and get your compost thriving again.
Preparing Winter Piles for Spring
Start by inspecting your compost bin for any damage caused by winter weather. Freezing temperatures, heavy snow, or disruptions might have impacted its structure. Look for signs of life in the pile, like a warm center or finished compost, to see if it’s still active.
"Assess a starting point, turn the pile, manage inputs, and repeat for a hot pile in no time." – Gemini Bhalsod, Illinois Extension horticulture educator
Next, grab a pitchfork and turn the pile to reintroduce air, which helps prevent anaerobic conditions. If the pile feels overly wet, avoid adding water while turning it. On the other hand, if it’s too dry, add enough water to reach a damp, sponge-like consistency. Spring weather can be unpredictable, so check moisture levels weekly. If heavy rain is in the forecast, cover the pile with a tarp to avoid oversaturation. Once the structure is restored, you can focus on balancing the nutrients to encourage faster decomposition.
Balancing Greens and Browns in Spring
Spring often brings an abundance of fresh green materials – like grass clippings, young weeds, kitchen scraps, and coffee grounds – that are rich in nitrogen and perfect for rebalancing your compost. To maintain an ideal composting environment, aim for a 1:2 ratio of greens to browns. For every bucket of greens, add two buckets of carbon-rich browns, such as dried leaves. If you’re low on browns from last fall, shredded newspaper, cardboard, or small twigs can work as substitutes.
For faster decomposition, chop larger pieces into smaller bits to increase their surface area. For example, pairing coffee grounds with dried leaves creates a great balance, combining nitrogen from the grounds with carbon from the leaves. As summer approaches, consider cutting back on high-nitrogen inputs by about 25% to prevent overheating.
Reactivating Microbial Activity
Once you’ve balanced the greens and browns, the warmer spring temperatures will naturally wake up the compost’s microbes. To give them a boost, mix nitrogen-rich materials – like grass clippings, fresh weeds, or kitchen scraps – into the pile. A 3:1 ratio of existing compost to fresh nitrogen inputs can help jumpstart microbial activity within a week or so. Regularly turning the pile will keep air circulating and support microbial growth.
If your compost still seems sluggish, consider using compost activators or introducing Red Wiggler worms. Back in March 2025, Uncle Jim’s Worm Farm suggested adding their Compost Activator or Red Wiggler worms to neglected compost piles. They emphasized that regular turning helps evenly distribute materials and speeds up decomposition.
Keep an eye on your pile’s temperature – heat building up in the center is a clear sign that the microbes are hard at work. With these steps, your compost will be ready to fuel your garden in no time.
Summer Composting: Managing Heat and Speed
Summer’s intense heat can make composting tricky, but with the right techniques, you can turn up the speed on creating nutrient-rich compost. A few adjustments can help you harness the season’s energy while avoiding common pitfalls.
Preventing Overheating in Hot Weather
When temperatures soar, your compost pile can overheat, which might harm the microbes responsible for breaking everything down. Surprisingly, this can actually slow the process. Keeping your pile at an ideal temperature is key during the summer months.
Start by picking the right spot. Place your compost bin in a shaded area or create shade with a tarp, lid, or shade cloth if natural shade isn’t available. Direct sunlight can dry out your pile and cause uneven heating, which stresses the delicate composting ecosystem. Use a compost thermometer to monitor the internal temperature, aiming to keep it between 130°F and 160°F.
If the temperature climbs too high, act fast. For example, one composter using a Vego system noticed their pile had dried out completely after a heatwave. They started misting it lightly every other day, and within a week, the pile was back on track.
"Summer heat can dry out your compost pile faster than you realize. Compost microbes need moisture to do their job, while too much water can turn your pile into a funky-smelling swamp."
- Vego Composter
Size matters, too. A smaller pile – around 3 feet by 3 feet by 3 feet – helps prevent overheating while still maintaining enough mass for proper decomposition. Turning the pile every 5–7 days redistributes heat and boosts oxygen flow, keeping everything balanced.
Moisture is another big factor. Aim for a texture similar to a wrung-out sponge. Water your pile during the cooler morning hours to minimize evaporation, and check moisture levels frequently since heat accelerates water loss.
Once temperature and moisture are under control, the next challenge is managing odors.
Controlling Odors During Fast Decomposition
While summer heat speeds up decomposition, it can also lead to unpleasant smells if your pile becomes unbalanced. Poor aeration or too much moisture can create anaerobic conditions, resulting in odors like rotten eggs or swamp gas.
The trick is to balance your greens (nitrogen-rich materials) and browns (carbon-rich materials). A ratio of two to three parts browns to one part greens usually works well. For instance, one composter dealt with an overload of zucchini scraps by adding shredded cardboard and dried plant stalks from the previous fall. This improved aeration and kept the pile smelling fresh.
"Aeration is key to a happy compost pile. Especially in summer, when heat speeds up microbial activity, turning your compost every 5 to 7 days helps maintain oxygen flow and prevents it from overheating."
- Vego Composter
To manage food scraps effectively, chop them into smaller pieces to speed up decomposition, and consider freezing or refrigerating them before adding them to the pile to reduce immediate odors. Always cover kitchen scraps with a layer of browns like dried leaves or shredded paper. Avoid adding meat, dairy, or oily foods, as these are notorious for creating persistent smells in hot weather.
Odor-controlling amendments can also help. Adding 5–10% mature compost can speed up decomposition and reduce odors. Materials like zeolite or biochar can bind odor-causing gases, and a layer of straw or mature compost on top can act as a bio-filter to trap escaping smells.
With odors under control, you’ll be ready to tackle the challenges of extreme summer weather.
Protecting Compost from Extreme Weather
Summer doesn’t just bring heat – it can also mean storms, flooding, and drought, all of which can disrupt your composting efforts. Staying prepared ensures your pile keeps decomposing smoothly.
For heavy rain or storms, cover your pile with a tarp secured by bricks or stakes. Elevate your bin on concrete blocks or pallets to prevent water from pooling underneath, and dig small trenches around the area to divert excess water. If you’re using a sealed tumbler system, you have the added advantage of being able to move it to higher ground when needed.
In drought conditions, partial shade can help conserve moisture. Shape the top of your pile into a shallow depression to catch any rainfall, and apply a thick layer of mulch around the edges to retain moisture. Water strategically during cooler morning hours, and use collected rainwater or greywater whenever possible.
Monitor moisture levels weekly during extreme weather. The goal is to keep the pile as moist as a wrung-out sponge. If heavy rain leaves it too wet, add dry brown materials to restore balance. On the flip side, adjust shade coverage to prevent rapid drying under intense sunlight.
Fall Composting: Preparing for Winter
As summer fades, fall offers a perfect chance to prep your compost pile for the colder months ahead. With an abundance of fallen leaves – rich in carbon – this season is ideal for balancing your compost and setting it up to thrive during winter. By gathering materials and managing your pile now, you can ensure a productive composting process even when temperatures drop.
Using Fall Leaves for Carbon Storage
Fall leaves are an excellent source of carbon, which is essential for balancing the nitrogen inputs your compost will get over winter. A well-balanced compost pile typically contains about two-thirds carbon (brown materials) and one-third nitrogen (green materials).
To make the most of this resource, collect leaves once they’ve turned brown but before they get soaked by rain. Shredding the leaves with a lawnmower or leaf shredder helps them break down faster, as whole leaves can clump together and slow the process. Store the shredded leaves in breathable bags or containers near your compost bin so you have a steady supply of brown materials throughout the season.
You have a couple of options for using these leaves: create a separate leaf pile that will decompose into garden-ready material in about four to six months, or add the leaves in smaller amounts to your regular compost pile. Be sure to layer them with nitrogen-rich materials like kitchen scraps or grass clippings to prevent matting. However, avoid leaves from black walnut, butternut, or eucalyptus trees, as they contain compounds that can harm plants.
Preparing Compost for Cold Weather
Getting your compost pile winter-ready involves creating conditions that help it stay active despite the cold. While decomposition slows in winter, it doesn’t have to stop completely. The secret? Insulation.
Start by insulating your pile’s core with straw, leaves, or similar materials. You can also cover the pile with old rugs, carpets, or foil-backed bubble insulation sheets. Surrounding your compost bin with bags of leaves or straw bales adds another layer of protection.
Size matters, too – a pile that’s at least 3’x3’x3′ is good, but a 5-foot cube is even better for retaining heat. Stockpile materials like leaves, straw, sawdust, woodchips, or shredded newspaper in the fall to ensure you have enough brown materials throughout the winter.
Maintaining the core temperature is key. Aim for a range between 104°F and 149°F to keep microbial activity going. Caleb Young, Owner and Founder of Rare Indoor Plants, emphasizes the importance of balance:
"To maintain decomposition over winter, you need to aim for a balance of green and brown ingredients… A ratio of 1 part green to 2 parts brown is ideal. Too many greens and the compost will be soggy and smell, whereas too many browns can slow down decomposition especially in colder months."
Young also stresses the importance of temperature control:
"The core temperature of your compost should be kept between 104-149 Fahrenheit to maintain active microbial activities and decomposition… It’s important to maintain the temperature to ensure decomposition and kill pathogens. Below these temperatures decomposition will slow significantly."
During winter, avoid turning the pile, as this can cause heat loss. Instead, focus on layering materials properly and managing moisture levels to keep everything balanced.
Protecting Compost from Pests
As animals prepare for winter, they may see your compost pile as a convenient food source. Taking steps to pest-proof your setup now can save you from headaches later.
Start by using a sturdy plastic or metal bin with a tight, locking lid. Seal any gaps with weatherstripping and secure the lid with bungee cords or weights if needed. Cover ventilation holes with mesh screens – opt for one-quarter inch hardware cloth made from 18–22 gauge wire.
Elevate your compost bin off the ground using bricks, a stand, or cement blocks. Reinforce the base with hardware cloth or wire mesh, burying it a few inches into the ground. Use 0.5 cm (¼ inch), 16-gauge mesh for small pests like mice, and 1 cm (½ inch), 20-gauge mesh for larger animals.
Position your compost pile away from potential food sources like bird feeders, pet bowls, garbage bins, or gardens. Avoid adding meat, dairy, bones, fish, bread, or oily and seasoned foods to your compost. To mask odors, bury food scraps under at least 12 inches of brown material. Keeping a balance of around 25:1 to 30:1 for brown-to-green materials can also help minimize smells that attract pests.
Natural deterrents can add an extra layer of protection. Sprinkle cayenne pepper, cinnamon, or garlic powder around the bin, or use pungent herbs like mint or lavender. You can also scatter citrus peels or place used cat litter (litter only), fur, or owl decoys nearby.
Regular maintenance is crucial. Aerate the pile every 3–4 days and keep the moisture level similar to a wrung-out sponge. Clean up any spilled materials and trim overgrown vegetation around the bin to eliminate hiding spots for rodents. If pests like maggots appear, address them quickly by turning the compost to boost microbial activity, freezing food scraps before adding them, or using boiling water or vinegar as spot treatments. For severe infestations, diatomaceous earth can be an effective solution.
sbb-itb-593149b
Winter Composting: Working in Cold Weather
Just because the temperatures drop doesn’t mean your composting efforts have to freeze. With a few adjustments, you can keep your compost pile active and thriving all winter long. The trick lies in working with the cold weather, not against it.
Insulating Compost Piles for Winter
Insulation is the secret to keeping your compost pile warm and active, even when it’s icy outside. Decomposing materials naturally generate heat, and proper insulation helps trap it, creating a cozy environment for microbes to keep doing their job.
Start with the basics: make sure your compost pile is at least 3’x3’x3′. A larger pile retains heat better and provides enough mass to sustain decomposition through the winter months. Add a thick layer of straw at the base and cover the pile to lock in warmth. You can even build straw bale walls around the pile for extra insulation and wind protection.
If you’d rather try alternative methods, here are a few ideas:
- Use old carpet (covered with plastic) or corrugated cardboard to line your bins.
- Invest in insulated compost tumblers or double-walled plastic bins with at least 2-inch insulation for consistent results.
- Modify your existing bin by adding foam insulation boards or surrounding it with an 8-12 inch layer of straw or hay.
The results can be impressive. Great Green Systems tested a compost jacket and found it could boost temperatures from 86°F to 140°F (30°C to 60°C), even in the dead of winter. As Compost Magazine explains:
"The insulation traps some of the heat, leading to more even decomposition."
Once your pile is well-insulated, you can even use winter’s natural snow cover to your advantage.
Composting Under Snow
Snow isn’t just a nuisance – it can actually help your compost. It provides a natural insulation layer, but you’ll need to manage it properly to get the most out of it.
Cover your compost bin with a tarp during snowstorms, securing it with bricks or heavy objects. This keeps direct snowfall out while still allowing air to circulate, preventing the pile from becoming waterlogged when the snow melts. You can also shovel snow into a semicircle around your bin to create windbreaks, which protect the pile from cold gusts that could steal away heat.
If your pile freezes, don’t panic. Add warm materials and re-insulate to help it thaw out. And remember, frozen piles will eventually come back to life when temperatures rise.
Adding Frozen Materials Safely
Winter composting means rethinking how you handle kitchen scraps and other organic waste. Frozen materials can shock the microbes in your pile, but with the right prep, you can keep things running smoothly.
Before adding frozen scraps, let them warm up. You can store them in a sealed 5-gallon bucket near a heat vent for about 24 hours to prevent thermal shock. Chop everything into smaller pieces – 1-2 inch chunks work best – to increase surface area and speed up decomposition.
Balance is key. Aim for a 2:1 ratio of brown to green materials during winter. Good winter additions include:
- Fruit peels, rinds, and cores
- Vegetable scraps
- Coffee grounds and paper filters
- Tea leaves and tea bags (without staples)
- Eggshells, straw, dried leaves, and plant debris
You can even get creative with your sources. Many coffee shops, like Starbucks, give away used coffee grounds for free, and post-Halloween pumpkins are an excellent addition.
However, steer clear of materials that can disrupt the process, like invasive plants, plants treated with weed killers, large woody twigs (unless shredded), and pine, spruce, juniper, or arborvitae wood and leaves.
Finally, plan ahead. Collect leaves in the fall and store them to use as "browns" throughout the winter. This ensures you’ll always have carbon-rich materials to balance the nitrogen-heavy kitchen scraps, keeping your compost pile active even in freezing weather.
Fixing Common Seasonal Composting Problems
Even seasoned composters run into challenges that change with the seasons. The good news? Most of these issues have simple solutions once you identify the root cause. Building on earlier seasonal strategies, this section focuses on practical fixes for common composting problems. Use these tips to keep your compost thriving year-round.
Fixing Moisture Problems
The right moisture level for compost is often compared to a wrung-out sponge – moist but not dripping wet.
When Compost Gets Too Dry
When your pile dries out, decomposition slows down. To fix this, gradually add water while mixing the pile to ensure even moisture. You can also toss in green materials like kitchen scraps, grass clippings, or fresh garden trimmings. These not only add moisture but also help speed up decomposition.
When Compost Gets Too Wet
Too much water can create anaerobic conditions, which lead to unpleasant odors. Christy from Gardenerd explains:
"Too wet also equals a perfect environment for anaerobic bacteria. That’s the smell you’re experiencing. Anaerobic bacteria thrive in a non-oxygen environment if your compost is too wet. Give the pile more oxygen and they should die off."
To fix this, mix in brown materials like dry leaves, straw, or shredded paper to soak up the excess moisture. Turning the pile regularly improves airflow, which helps restore balance. Covering your pile can also protect it from rain, and sticking to a ratio of one part nitrogen to two parts carbon helps maintain the right conditions.
Dealing with Temperature Problems
Temperature plays a big role in composting. The sweet spot for decomposition is between 90°F and 140°F (32°C to 60°C). If it drops below 90°F, the process slows. Go above 140°F, and beneficial microorganisms start to die off.
Summer Overheating
When summer heat pushes your compost above 140°F, it’s time to adjust. Reduce nitrogen-rich inputs, water the pile in the evening to prevent evaporation, and turn it more often to release trapped heat. Smaller piles and frequent turning work well in hot weather. You can also bury fresh kitchen scraps 6–8 inches deep to protect them from surface heat. Keeping the carbon-to-nitrogen ratio balanced is key, as too much nitrogen can cause overheating.
Winter Temperature Drops
In colder months, larger piles retain heat better. Insulating the pile with straw bales, bags of leaves, or a dark tarp helps trap warmth. Turn the pile less frequently – about every 4–6 weeks – to keep heat from escaping. Concentrate nitrogen-rich materials like coffee grounds or vegetable scraps in the center to boost internal warmth. Chopping scraps into smaller pieces also speeds up decomposition. Tools like a compost thermometer and moisture meter can help you monitor and maintain the right conditions.
Solving Material Issues by Season
Each season brings a unique blend of composting materials, and this can throw off the balance of your pile.
Spring: Too Many Greens
Spring often brings an abundance of nitrogen-rich materials like grass clippings, young weeds, and kitchen scraps. While these are great for reactivating your pile after winter, too many greens can create a slimy, smelly mess. To fix this, mix in more browns like dried leaves, shredded paper, or straw. Aim for a ratio of three to four parts browns for every one part green.
Fall: Too Many Browns
Fall piles often overflow with browns – dried leaves and spent plants – while greens are harder to come by. Too many browns can stall decomposition by preventing the pile from heating up. Add greens like coffee grounds, kitchen scraps, or fresh garden waste to restore balance. You can also save some dried leaves for use in winter or spring to keep things balanced year-round.
Quick Reference for Common Problems
Here’s a handy table to troubleshoot and fix common composting issues by season:
| Problem | Likely Cause | Quick Fix |
|---|---|---|
| Stinky, rotten smell | Too many greens | Add browns to balance excess greens |
| Strong putrid odor | Lack of aeration | Turn the pile to add oxygen |
| Excessively wet texture | Too wet or too many greens | Add browns and protect from rain |
| Pile not heating up | Not enough nitrogen | Add greens like kitchen scraps |
| Excessively high temperature (>160°F) | Too much nitrogen | Add browns and turn for aeration |
| Dry, not breaking down | Too many browns | Add greens to boost bacterial activity |
Year-Round Composting Success
Seasonal composting thrives on adapting to nature’s rhythms. Each season brings its own challenges and opportunities: spring revives the pile, summer speeds up decomposition, fall focuses on preparation, and winter keeps the process insulated and steady. By making these adjustments, you can maintain a productive composting system all year long.
Key Tips for Seasonal Composting Success
To keep your compost pile healthy across the seasons, you’ll need to tweak its temperature, moisture, and aeration. For example, in winter, insulate the pile to retain heat; in summer, provide shade to prevent overheating. Spring is the time to reintroduce nitrogen-rich "greens", while fall is perfect for stockpiling carbon-rich "browns" like dried leaves. A well-maintained compost pile should feel warm to the touch, signaling active decomposition.
Managing moisture is another seasonal challenge. In summer, check the pile every 2–3 days, adding water deeply when it feels dry. Spring often requires shielding the pile from excessive rain while keeping it moist enough for decomposition. During fall and winter, insulating the pile and carefully layering materials help maintain the right moisture levels.
Aeration needs also vary. In summer, frequent turning ensures proper airflow and prevents anaerobic conditions. On the other hand, winter composting benefits from less frequent turning – about once a month – to preserve the heat within the pile.
The carbon-to-nitrogen ratio is easier to manage when planned seasonally. Spring brings plenty of greens like grass clippings, which can be balanced with the browns you’ve stored from fall. Summer typically offers a steady supply of both materials, while fall is ideal for gathering and shredding leaves to stockpile carbon sources for the colder months.
Here’s a quick breakdown of how to manage your compost pile throughout the year:
| Season | Primary Focus | Key Materials | Maintenance Frequency |
|---|---|---|---|
| Spring | Reactivation and balance | Grass clippings, coffee grounds, stored leaves | Weekly moisture checks |
| Summer | Heat and moisture management | Green trimmings, stored browns | Monitor every 2–3 days |
| Fall | Preparation and stockpiling | Dried leaves, straw, cardboard | Set up insulation |
| Winter | Insulation and steady upkeep | Kitchen scraps, coffee grounds, shredded paper | Turn once a month |
Supporting Eco-Friendly Living Through Seasonal Practices
Seasonal composting doesn’t just benefit your garden – it plays a role in reducing greenhouse gas emissions. By keeping organic waste out of landfills, you prevent the creation of methane, a powerful contributor to climate change. Instead, this waste is transformed into nutrient-rich compost that improves soil health, retains moisture, and attracts beneficial organisms.
This year-round approach ensures you’re always producing compost. In spring, nutrient-rich compost can enrich your garden beds. Summer’s faster decomposition handles the surge of waste from the growing season. Fall preparations lay the groundwork for winter composting, which continues to divert kitchen scraps even during the colder months.
FAQs
How can I keep my compost pile active during the winter when it’s cold outside?
To keep your compost pile working through the winter, size matters. Aim for a pile that’s at least 3 feet by 3 feet. The bigger the pile, the better it retains heat – crucial for keeping those hardworking microbes active when the temperature drops.
When the weather consistently dips below freezing, resist the urge to turn the pile frequently. Turning it too often can let valuable heat escape, slowing down the composting process. Instead, focus on insulation. Add a layer of straw, leaves, or finished compost on top. This extra layer helps lock in heat and shields the pile from excess moisture caused by snow or rain.
With these strategies, your compost can keep breaking down materials, even when the thermometer plunges.
How can I maintain the right carbon-to-nitrogen ratio in my compost pile during fall?
To maintain a well-balanced compost pile during the fall, combine carbon-rich materials (browns) like dried leaves, straw, or shredded paper with nitrogen-rich materials (greens) such as fruit and vegetable scraps or grass clippings. The ideal mix is about 30 parts carbon to 1 part nitrogen, which promotes effective decomposition.
Make sure to turn your compost pile every 1–2 weeks. This aerates the pile, ensuring the materials break down evenly. Keep an eye on the moisture level, too – it should feel like a damp sponge. If it’s too dry, sprinkle in some water. If it’s too wet, balance it out by adding more dry browns. Following these steps will help your compost thrive throughout the season.
How can I keep my compost pile from overheating in the summer while ensuring it decomposes effectively?
To keep your compost pile from overheating in the sweltering summer months, you need to strike the right balance between moisture, airflow, and the types of materials you add. Moisture is key – your pile should feel like a damp sponge, not a soggy mess. If it’s drying out, give it a light sprinkle of water to keep things on track.
Turning the pile regularly is another must. This improves airflow, helps release trapped heat, and ensures the materials break down evenly. Be mindful of what you’re adding, too – dumping in a ton of nitrogen-rich materials like grass clippings all at once can crank up the heat too much. Instead, mix in carbon-rich items like dried leaves or shredded paper to balance things out.
If the pile’s temperature consistently hits 160°F or higher, it’s time to take action. Spread the compost out temporarily to let it cool before putting it back together. Following these steps will help your compost thrive, even during the hottest days of summer.