Journal layering turns plain pages into rich, textured designs using paper, photos, stickers, and more. It’s not just about aesthetics – it’s a mindful, creative process that helps you express emotions, process thoughts, and enjoy the present moment. Here’s what you need to know to get started:
- What You’ll Need: Basic tools like scissors, glue, and paper trimmers, plus materials like patterned paper, fabric, stamps, and inks.
- How It Works: Start with a textured background, add middle layers for depth (like die cuts or stickers), and finish with details like stitching or metallic accents.
- Why It Matters: Layering can help you express emotions, practice mindfulness, and embrace imperfection. It’s a personal, flexible way to create art.
- Tips for Success: Use archival-quality materials, keep your pages balanced, and don’t fear mistakes – they’re part of the process.
Start small, experiment freely, and focus on the process rather than perfection. Your journal can become a personal space for creativity, reflection, and self-discovery.
Getting Started: Journal Layering Fundamentals
What is Journal Layering?
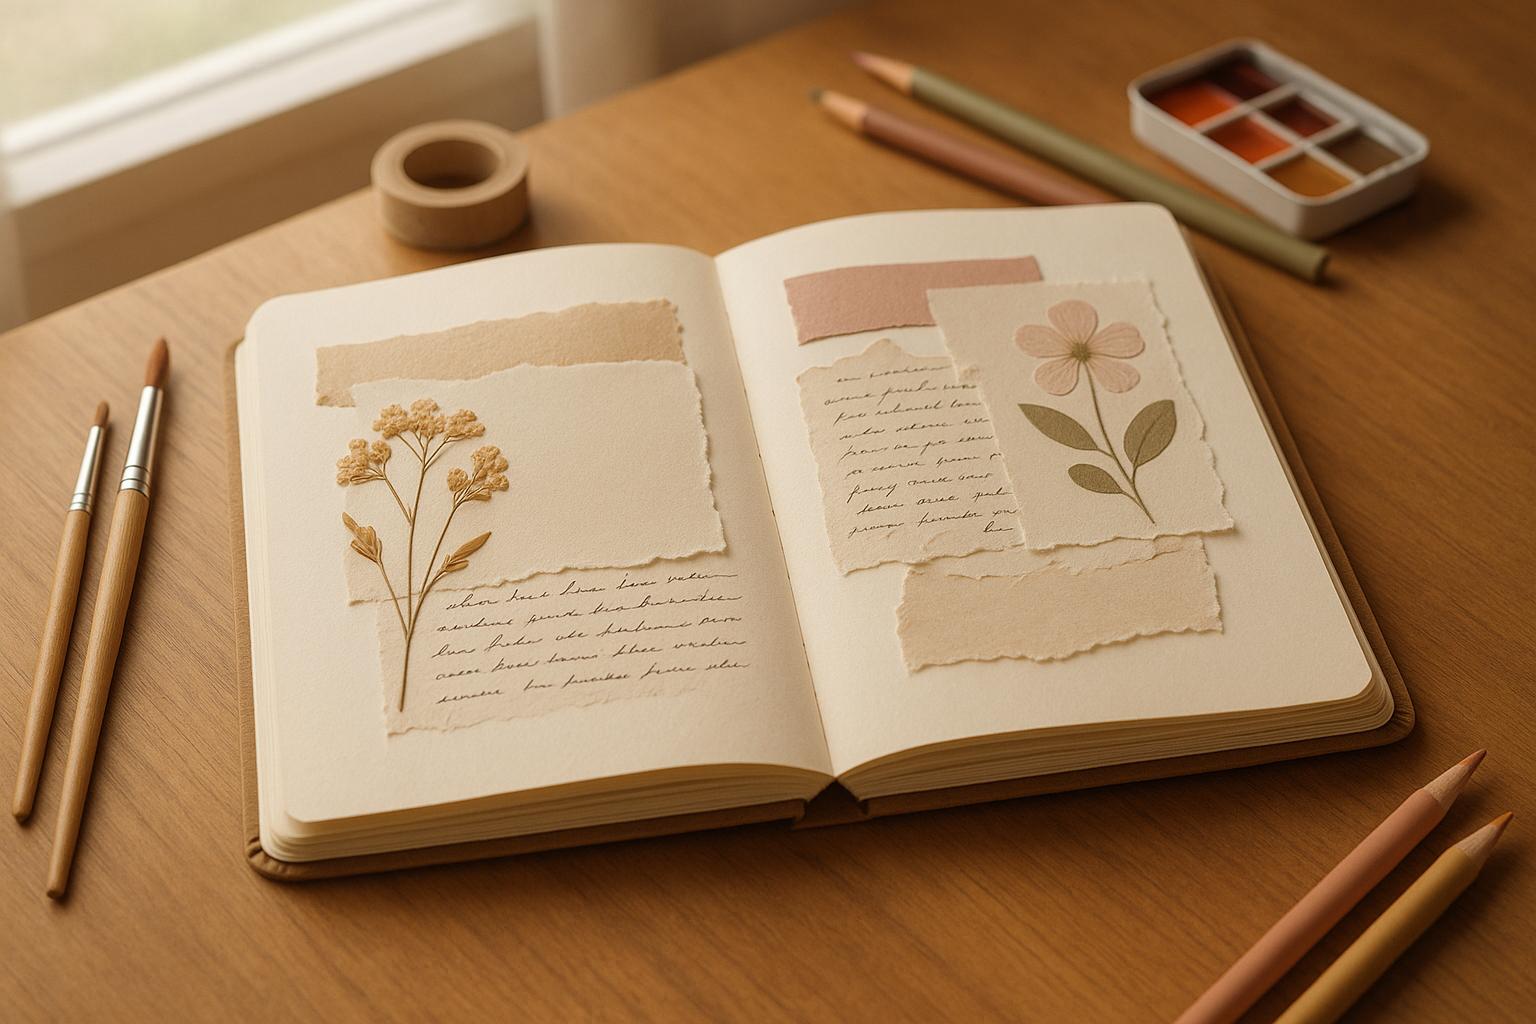
Journal layering is all about creating depth and dimension on your journal pages by stacking different materials – painted backgrounds, patterned papers, fabrics, and embellishments – to tell a story or capture an emotion. Picture it as building a "visual sandwich", where each layer adds its own flavor to the final composition. You might start with a painted base, then layer on patterned paper, add some lace or fabric scraps, and top it off with stamps, stickers, or handwritten notes.
Another key aspect of layering is texturing, which brings a tactile element to your pages. This could mean using modeling paste to create raised designs, embossing powders for a shiny finish, or even sewing fabric directly onto the page. The idea is to create journal pages that invite both visual and physical interaction, making them as engaging to touch as they are to look at.
Now that you know the basics, it’s time to gather the tools and materials you’ll need to dive into this creative process.
Materials and Tools You Need for Layering
Starting with journal layering doesn’t have to break the bank, but having the right tools can make the process smoother and more enjoyable. Here’s what you’ll need:
- Basic tools: A paper trimmer for clean edges, glue sticks or double-sided tape for sticking layers together, sharp scissors for detail work, and foam tape for adding dimension.
- Texturing supplies: Gesso and modeling paste for creating textured backgrounds, embossing powders with a heat tool for metallic or glossy effects, and stencils or masks for consistent patterns.
- Extra touches: If you’re feeling adventurous, a sewing machine or simple needle and thread can add a unique stitched texture, while also securing your layers.
As for materials, stock up on patterned papers, cardstock in different textures, fabric scraps, lace, stamps, and inks. Vintage ephemera like postcards, postage stamps, or old tickets can add a nostalgic vibe. Old magazines are also treasure troves for imagery, fonts, and text snippets – perfect for collaging.
If you’re just starting out, keep it simple. Use pre-cut die cuts, stickers, or textured cardstock to practice layering. Stick to a limited color palette at first to maintain balance and harmony in your designs while you get the hang of the basics.
Once your materials are ready, it’s time to think about how to make your layering practice more meaningful.
Setting Goals for Your Journal
Approaching journal layering with a purpose can transform it from a casual craft into a deeply personal and rewarding creative outlet. Creativity coach Carrie emphasizes the importance of goal setting in artistic practices:
"When we define what we want, we pave the way for intentional action".
Start by identifying what you want to achieve through layering. Are you looking to process emotions, record memories, experiment with new techniques, or simply unwind from the stresses of daily life? Your goal could be as personal as self-expression or as practical as improving your artistic skills.
To stay focused, try setting SMART goals – ones that are Specific, Measurable, Achievable, Relevant, and Time-bound. For example, you might decide to create one layered page every Sunday. This gives you a clear target and an easy way to track your progress.
Make sure your goals align with what matters most to you. If mindfulness is a priority, you could focus on layering as a meditative practice. If family is your focus, create pages that celebrate your loved ones and shared memories. As Carrie reminds us:
"Goals don’t have to be rigid rules that stifle your creativity. When approached thoughtfully, they can be tools for clarity, growth, and fulfillment".
Set yourself up for success by creating a peaceful workspace where you can focus without distractions. Even dedicating just 15 minutes to your practice can be meaningful. Before starting, take a moment to breathe and set a simple intention for the session. It could be as straightforward as "I want to play with textures today" or "I’ll let go of perfection and just enjoy the process."
If you’re working toward a larger goal, break it into smaller, manageable steps. For instance, if you aim to fill an entire journal with layered pages, start by completing one page per week. Reflect on each session by noting what techniques you tried, which materials you enjoyed, and how the process felt. This kind of reflection not only helps you track progress but also deepens your understanding of what inspires you.
Above all, remember that mindfulness is about being fully present in the moment, aware of your thoughts and feelings without judgment. The beauty of journal layering lies in focusing on the process, not the outcome. Let each session unfold naturally, staying connected to your intentions, and enjoy the journey.
Mixed Media Art Journal Tutorial- BUILDING LAYERS- MAKING FOCAL STAND OUT-Beginner Friendly
Layering Methods: Building Depth and Texture
Crafting journal layers is like weaving a visual story, where each element contributes to the overall narrative. The goal is to create depth and texture without overwhelming the page. Here’s a breakdown of three key steps to transform your journal pages into dynamic, textured works of art.
Making Background Layers
The background layer acts as the emotional foundation of your journal page. It doesn’t have to be flawless – it just needs to reflect your mood and intentions authentically.
Start by jotting down your thoughts directly on the page. Let your writing flow freely to capture the moment. Then, layer in texture by gluing down scraps of paper, mesh, or strips of washi tape. These elements add visual interest and a tactile quality.
To build more texture, apply thick layers of white gesso. This creates a raised surface that interacts with light and shadow. Once the gesso dries, drip acrylic ink onto the surface and spritz it with water to create fluid, organic patterns. For example, one artist allowed her design to evolve gradually over several days, adding layers as inspiration struck.
Other techniques can bring even more character to your background. Watercolor splotches can add bursts of color, while smeared acrylic paint creates bold, expressive strokes. Try painting stripes for a geometric touch or use charcoal for moody, smudged effects. Stencils are another great tool – apply acrylic paint through them for controlled patterns, and use a brayer with white paint to blend everything together. Tissue paper can also create translucent, playful effects, especially when you let the process unfold naturally on a random page.
As Amy Johnson Maricle from Mindful Art Studio shares:
One of the issues I hear most frequently from art journaling students is that they have no idea what to do with their backgrounds.
Once your background feels complete, it’s time to move on to the middle layers, where your page begins to take on personality and structure.
Adding Middle Layers for Visual Appeal
The middle layers are where your journal page comes to life. This step introduces elements that build dimension and visual intrigue, turning a flat page into a captivating composition.
Start by selecting a color palette to ensure harmony across your design. Lay down a base of patterned or solid paper, then layer smaller pieces on top in varying shapes and sizes to create rhythm and balance.
To add depth, incorporate die cuts, stickers, and ephemera around focal points. Use foam tape to give these elements a three-dimensional effect. Be mindful of balancing heavier and lighter elements to avoid a cluttered look. Slightly overlapping pieces can also help tie the composition together.
Texture plays a vital role at this stage. Combine different materials – smooth gesso with stitched fabric, or glossy embossing with rough fabrics – for a tactile experience that keeps the viewer engaged. Strips of fabric or lace, cardstock mats for photos, and stenciled patterns can all add richness and cohesion to your page.
Adding Final Layers and Details
The final layers pull everything together, creating a polished and cohesive design. This step is all about refining and adding those last details that make your page feel complete.
Revisit your color palette to ensure everything feels unified. Strategically place washi tape and stickers to fill empty spaces and enhance depth. Before committing, experiment with the arrangement to maintain flexibility.
Quotes are a great way to add meaning and fill gaps. As Kelsey, a scrapbook-style journaler, explains:
I think adding little quotes like this also really helps the spread to look full and cohesive.
Small details can elevate your page further. Try adding stitching, pressed flowers, or metallic accents for an extra touch of charm. And don’t worry about mistakes – they’re part of the creative process. Cover up missteps with additional layers, as these fixes often lead to unexpected and delightful results. As Kelsey wisely notes:
One mistake does not mean you have to trash the whole spread. There are many ways you can be creative and fix it!
These layering techniques are a foundation for endless creative possibilities in your journaling journey.
sbb-itb-593149b
Creative Methods for Mindful Layering
Mindful layering transforms your journal into a canvas for emotional expression and self-discovery, blending color, texture, and the beauty of imperfection.
Using Color and Texture to Show Emotion
Color speaks volumes when it comes to emotions in mindful journaling. By layering colors, you can reflect your inner world visually – deep blues might evoke calm and introspection, vibrant reds could channel passion or intensity, while soft yellows might symbolize hope or warmth. These colors form the foundation of your page, flowing and blending naturally to create a vivid emotional landscape.
Texture takes this emotional storytelling even further. Materials like modeling paste can represent the heaviness of certain feelings, while delicate tissue paper might capture the fragility of fleeting emotions. These tactile elements anchor you in the present moment, helping to shift focus away from anxious thoughts and into mindful creativity.
Personalize your layers with meaningful additions: magazine clippings that reflect aspirations, old photographs that preserve cherished memories, or fabric scraps tied to special experiences. Brushstrokes, doodles, or impromptu scribbles can express emotions too raw or complex for words. Each layer becomes a step in exploring and expressing your emotions.
Once you’ve laid down these expressive elements, the challenge is to bring them together in a cohesive way.
Creating Balance in Your Layers
Creating balance in your journal doesn’t mean everything has to be symmetrical. Instead, it’s about arranging elements so they feel harmonious. Starting with a limited color palette can help unify your layers and keep the design cohesive.
Artist Tesia Blackburn explains her approach:
When I’m creating a painting, I’m always trying to establish harmony. I would say it’s the one thing I’m after and it’s the hardest to explain. As I paint, I use basic design principles and work the visual arrangement of elements to create harmony.
Repetition is another way to build rhythm and unity across your page. For instance, repeating shapes in different sizes or using stencils to create recurring patterns can tie everything together. At the same time, subtle variations keep things visually engaging. Contrast also plays a key role – think of a bold complementary color, a smooth surface breaking up rough textures, or a geometric shape standing out in a fluid design. These contrasts can draw attention to focal points and add depth to your composition.
Feel free to experiment by mixing techniques – combine writing with painting, layer doodles over stamped patterns, or blend collage elements with painted backgrounds. This variety keeps your pages dynamic while recurring shapes or colors maintain a sense of cohesion.
Achieving balance not only enhances the visual appeal of your journal but also deepens the mindfulness of your creative process.
Accepting Imperfection and Trying New Things
Beyond the layers of color, texture, and balance, embracing imperfection can be one of the most rewarding aspects of mindful journaling. Letting go of the need for perfection creates space for genuine exploration and self-expression. Your journal becomes a reflection of your evolving, wonderfully imperfect self.
Think of your journal as a playground for creativity – a place to test new techniques without the pressure to achieve a flawless result. Try layering materials you’ve never combined before, experiment with bold color pairings, or dive into methods that feel outside your comfort zone. The goal isn’t to produce a masterpiece; it’s to enjoy the process of discovery.
As TinkerLab points out:
The beauty of this exercise lies in its simplicity and the ability to be present in the creative process. There’s no need to aim for perfection or a gallery-worthy final outcome.
Mistakes aren’t failures – they’re opportunities. If a page doesn’t turn out as planned, layer over it or incorporate the so-called "error" into your design. This approach not only builds resilience but also encourages creative problem-solving.
When your inner critic shows up, practice self-compassion. Replace negative thoughts with affirmations that celebrate your effort and courage to try something new. Wellness expert Keriki Suber captures this beautifully:
Embracing imperfection doesn’t diminish your capabilities but fosters resilience and a healthier mindset.
Practical Tips for Caring for Layered Journals
Taking good care of your layered journal ensures its pages remain vibrant and intact for years to come. By protecting it from damage, selecting high-quality materials, and maintaining its condition, your journal can evolve from a creative outlet into a cherished keepsake.
Preventing Warping and Tears
Warping can be a real headache for layered journals, often caused by moisture from adhesives. Using too much glue or the wrong type can weaken delicate pages. Here’s how to keep your pages smooth and tear-free:
- Choose the right adhesive: Opt for archival glue sticks, gel mediums, or dry adhesives when working with thin paper.
- Apply adhesives carefully: Spread glue thinly and evenly. For liquid adhesives, apply them on the base surface instead of directly onto delicate layers.
- Press and dry: Once adhesive is applied, press the layers flat under a heavy object until fully dry to ensure even drying.
- Store adhesives properly: Keep them in a cool, dry spot away from sunlight, and always clean nozzles after use for optimal performance.
Once your layers are secure, focus on using materials that stand the test of time.
Choosing Long-Lasting Materials
The materials you use play a huge role in how well your journal holds up over time. Here’s how to make smart choices:
- Archival inks: These are designed to last. If you prefer dye inks, seal your work with Krylon Workable Fixative to guard against fading.
- Quality paper: A sturdy, smooth surface like Strathmore 300 Series Bristol Paper (100 lb, 270 g) is perfect for mixed media, offering durability and versatility.
- Extend ink pad life: Keep a re-inker handy to refresh your ink pads when they start to dry out.
- Avoid non-archival materials: For example, Mod Podge isn’t acid-free or pH-neutral, making it less suitable for long-term projects. Instead, use acrylic gel mediums for better durability. Similarly, replace regular masking tape with artist tape, which is low-tack and less likely to damage your pages.
Here’s a quick material guide for your journal supplies:
| Material Type | Budget Option | Archival Quality | Price Range |
|---|---|---|---|
| Ink Pads | Basic dye inks | Tim Holtz Archival Mini Kit | $11.25 |
| Blending Tools | Basic foam brushes | Yoseng 12-Pack Blending Brushes | $12.99 |
| Paper | Standard copy paper | Strathmore Bristol Pad (14×17") | $21.89 |
| Fixative | Hair spray | Krylon Workable Fixative (11 oz) | Check Blick Art Materials |
Fixing and Updating Old Layers
Even with the best care, your journal might need a little TLC over time. Whether it’s repairing damage or updating older pages, restoration can give your journal a fresh look while keeping its original charm intact.
- Assess the damage: Small tears, faded areas, or edges starting to lift can often be worked into new designs rather than fully restored.
- Blend old and new: When updating a page, use translucent materials like tissue paper or diluted paints to create smooth transitions between original and added layers.
- Preserve sentimental pages: For pages with emotional value, apply a thin, isolating layer before adding new media. This ensures changes are reversible and don’t overpower the original work.
- Document the process: Take photos before, during, and after major updates. This helps track your techniques and account for lighting changes, as colors can look different under various conditions.
- Reconstruct with care: For more severe damage, use reproductions or reference photos of similar pages to guide your restoration efforts.
Sometimes, imperfections are part of the charm – they tell the story of your journal’s journey. Embrace them as part of its unique character and history.
Conclusion: Start Your Journal Layering Journey
Dive into journal layering with just one page and an open mind – each layer you add transforms your thoughts into a vibrant visual story. The magic lies in the process of discovery and self-expression.
Journal layering isn’t just about creating art; it’s about personal growth. Experts highlight that art journaling can be a powerful tool for self-reflection, emotional healing, and resilience. With every texture, color, or word you add, you’re building a visual diary of your inner world – one that evolves as you do.
This practice also encourages mindfulness. Every brushstroke, every piece of paper you glue down, and every word you write becomes a moment to pause and be present. Pairing journaling with meditation can help you slow down, breathe, and reconnect with yourself on a deeper level. It’s a simple yet profound way to blend creativity with calm.
And the best part? You don’t need fancy tools or artistic talent to get started. A basic notebook and a handful of supplies are enough to turn a blank page into your creative haven. As mindfulartstudio.com perfectly puts it:
"It’s one of the most forgiving ways to make art because in an art journal, everything you make is safely contained within your own personal book."
Journal layering invites you to embrace imperfection and see beauty in the unexpected. This mindset can ripple into other parts of your life, helping you approach challenges with more flexibility and acceptance.
Your journal can become a private retreat – a space to experiment, reflect, and grow. Each page you create adds depth to your understanding of yourself and your creative potential. It’s a place where you can process life’s highs and lows while building emotional strength and leaving behind a tangible record of your journey.
So why wait? Open your journal, splash on some paint, glue down scraps of paper, and let your creativity lead the way. Trust the process, and watch as your layered journal becomes a cherished companion on your path to mindfulness and self-discovery.
FAQs
What are some common mistakes beginners make when layering in journals, and how can they avoid them?
Beginners often stumble upon a few common pitfalls when layering in journals, which can impact the overall aesthetic of their pages. One frequent misstep is overcrowding – cramming too many elements onto a single page can make the layout feel cluttered and overwhelming. To sidestep this, stick to a handful of textures and patterns that work well together. This approach helps create a clean and harmonious design.
Another issue is rushing the process by not giving enough drying time between layers. Skipping this step can result in smudged or muddled colors, robbing your page of its crisp details. Patience is key – allow each layer to dry fully before adding the next to keep your work sharp and defined.
Lastly, pay attention to your color choices and layering techniques. A cohesive color palette paired with varied layer heights can bring depth and dimension to your pages. This simple tweak can transform your journal into something visually striking and well put together.
How can layering in journals help with emotional expression and mindfulness?
Layering in journals offers a creative and soothing way to explore emotions while practicing mindfulness. By blending writing with textures and patterns, you create a space to safely express and process your thoughts. This approach encourages self-reflection, helping to untangle emotions and gain a clearer perspective.
Mindful journaling also nurtures awareness of the present moment, allowing you to engage with your feelings without criticism. Adding visual elements alongside your words transforms journaling into a meditative activity that can ease stress, spark creativity, and support emotional balance.
How can I creatively include personal keepsakes or memorabilia in my journal layers?
Adding personal mementos to your journal is a fantastic way to make it more meaningful and visually appealing. Consider using items like ticket stubs, postcards, or pressed flowers – you can attach them with washi tape, glue, or even create little pockets to tuck them into. These small keepsakes not only add texture and depth to your pages but also help bring your memories to life.
For a nostalgic touch, try using vintage papers such as old maps or music sheets as backgrounds or accents. Pair these with handwritten notes or photos to craft a page that tells a story unique to you. Your journal can be more than just a collection of words; it can become a creative reflection of your experiences and emotions!