Drip irrigation is one of the most efficient ways to water your garden, saving water, time, and effort while keeping plants healthy. This method delivers water directly to the roots, reducing evaporation and runoff. Here’s a quick overview of what you’ll learn:
- Benefits: Saves water, reduces weeds, and prevents plant diseases.
- Key Components: Backflow preventer, filter, pressure regulator, tubing, and emitters.
- Setup Steps: Plan your garden layout, choose the right parts, and follow easy installation instructions.
- Maintenance Tips: Regularly check for clogs, clean filters, and adjust settings seasonally.
Drip irrigation is ideal for gardeners looking for a low-maintenance, water-saving solution. With the right setup and upkeep, it ensures healthier plants and long-term savings.
Parts and How It Works
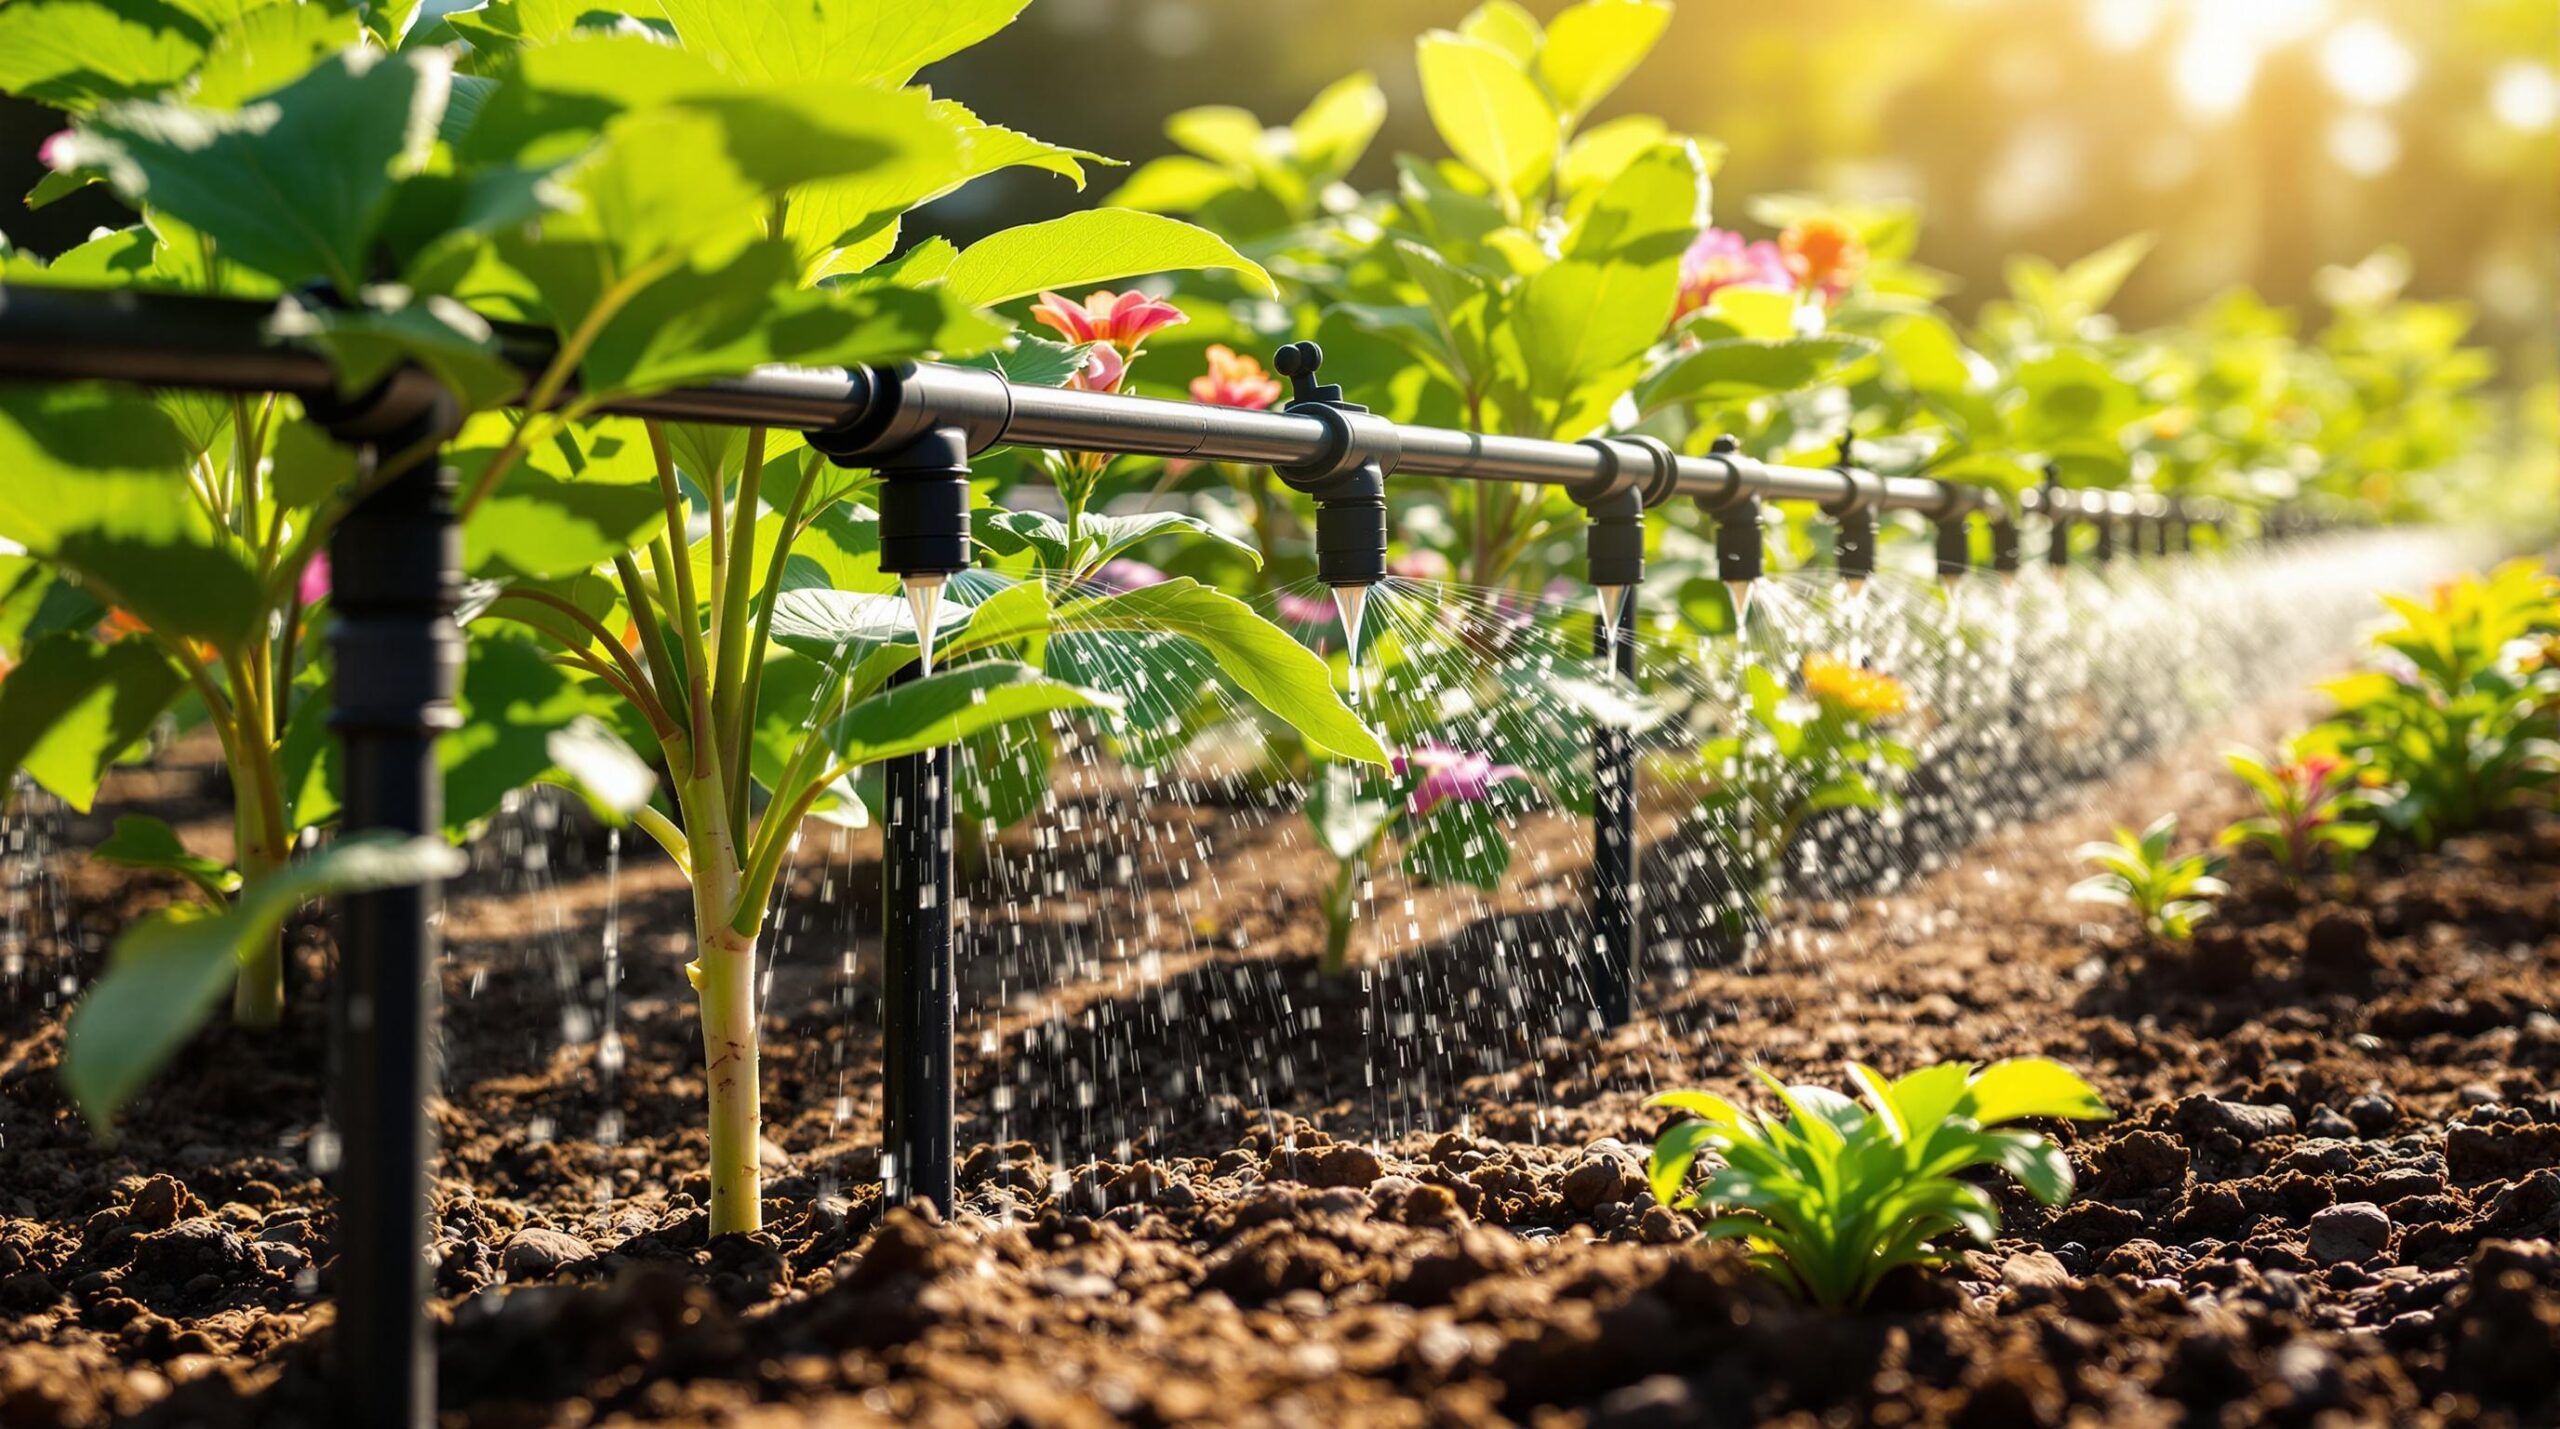
Main System Parts
Take a look at your garden layout as we break down the essential components and their functions.
A drip irrigation system uses several parts to ensure water reaches your plants efficiently:
- Backflow preventer: Keeps your drinking water supply safe from contamination.
- Filter: Removes debris and particles that could clog the system.
- Pressure regulator: Adjusts the water pressure for proper drip system operation.
- Mainline tubing: Transports water throughout the system.
- Emitters or microtubing: Delivers water directly to the root zone of each plant.
System Operation
Here’s how it works: water flows through the backflow preventer, then passes through the filter and pressure regulator before entering the mainline tubing. From there, the water moves to the emitters, which release it at a steady, controlled rate right at the plant roots. The system operates at a lower pressure than standard garden hoses, reducing overspray and evaporation. Running it during the cooler early morning hours helps conserve even more water.
Once you understand these components, you’re ready to plan your layout and choose the right parts in the next section.
Planning Your System
Garden Requirements
Start by sketching out your garden. Include the beds, pathways, and water connections. Here’s what you need to note:
- Garden size: Measure the total length and width.
- Water source distance: Determine how far the water source is for tubing placement.
- Water pressure: Measure the pressure at your faucet.
- Soil type: Identify if it’s sandy, loamy, or clay.
Group your plants based on their water needs. For example, place plants that need more water in one area and drought-tolerant ones in another. This will help you select the right emitters and flow rates.
Selecting Parts
With your garden map and plant groupings ready, pick components that fit your layout and watering needs:
- Mainline tubing: Use UV-resistant polyethylene tubing, sized for your longest runs.
- Emitters: Match flow rates to plant groups. For sloped areas, use pressure-compensating emitters.
- Fittings: Stock up on tees, couplers, end caps, goof plugs, and stakes. It’s smart to have around 10% extra tubing and fittings for adjustments or repairs.
Once you’ve gathered everything, follow the step-by-step setup instructions to install your system.
Setup Instructions
Tools and Parts List
To connect your drip irrigation system to a water source, you’ll need the following:
- Faucet adapter
- Backflow preventer
- Filter
- Pressure regulator
- Automatic timer
Water Source Setup
Start by attaching the components to your outdoor faucet in this order: faucet adapter, backflow preventer, filter, pressure regulator, and automatic timer. Make sure each connection is tightened securely to prevent leaks. Once the water source is set up, you’re ready to move on to laying out and installing the mainline and emitter tubing in the next steps.
Complete Garden Drip Irrigation Setup | Full System Install …
sbb-itb-593149b
Upkeep and Fixes
Keeping your drip irrigation system running smoothly requires regular attention. Here’s how to stay on top of it:
Regular Maintenance
- Inspect weekly: Look for clogs, leaks, or damage in the tubing and emitters.
- Clean the filter monthly: The filter attached to the faucet should be cleaned or replaced to avoid blockages.
- Test water pressure and flow: Every 2–3 months, check these to ensure water is being delivered evenly.
- Update timer settings: Adjust seasonally based on your plants’ watering needs.
Preparing for Weather Changes
- Winterize before freezing temperatures: Drain and disconnect the system when frost is expected (below 32°F). Use insulation covers on exposed parts.
- Spring cleaning: Flush the system thoroughly before starting regular use.
- Adapt to weather conditions: Adjust the watering schedule based on rainfall and temperature forecasts.
Troubleshooting Common Issues
- Clogged emitters: Remove them and soak in a vinegar solution, or replace if necessary.
- Low water pressure:
- Look for kinked tubing.
- Clean the system’s filter.
- Check the pressure regulator settings.
- Uneven watering:
- Make sure emitters aren’t blocked by mulch or soil.
- Verify proper spacing between emitters.
- Replace any damaged tubing sections.
Watering Methods Compared
Take a closer look at drip irrigation, sprinkler systems, and hand watering to evaluate water efficiency, cost, and labor. This comparison will help you decide which method works best for your garden.
Pros and Cons
| Feature | Drip Irrigation | Sprinkler Systems | Hand Watering |
|---|---|---|---|
| Water Efficiency | High – targets water directly to the roots | Moderate – some water lost to evaporation | Variable – depends on the gardener’s habits |
| Initial Cost | Moderate – requires setup investment | Higher – especially for large areas | Low – only basic tools needed |
| Operating Cost | Low after installation | Moderate – depends on system size | Varies – time is the main expense |
| Water Usage | Precise and adjustable | Covers large areas, but less precise | Inconsistent – prone to under- or overwatering |
| Plant Health | Excellent – keeps leaves dry and boosts roots | Good – wet leaves may lead to fungus | Good if done carefully, but time-intensive |
| Maintenance Needs | Seasonal checks for clogs | Occasional repairs and adjustments | Minimal – just basic tool upkeep |
| Labor Required | Low after setup | Low – can use timers for automation | High – manual effort for each session |
| Automation | Fully automatable | Can be automated with timers | Manual only |
Drip irrigation is efficient, delivering water straight to the roots while requiring minimal labor after setup. Sprinkler systems are great for large spaces but can waste water through evaporation or overspray. Hand watering, while simple and inexpensive, demands significant time and often results in inconsistent coverage. Consider water usage, costs, and maintenance requirements when selecting the best option for your garden.
For guidance on installation and upkeep, check out the Summary section next.
Summary
Drip irrigation provides water directly to plant roots, minimizing waste and improving overall plant health. With some planning and an initial investment, it can lead to long-term savings.
To keep the system running smoothly, regularly clean filters and check lines for clogs or damage. Using timers can help automate watering schedules and avoid overwatering. For detailed guidance, see the Setup Instructions and Upkeep sections.
As your garden evolves, the system can be expanded or adjusted to meet your needs, making it a practical solution for gardens of any size.
FAQs
Which plants or garden types benefit the most from drip irrigation?
Drip irrigation is ideal for plants and gardens that thrive with consistent, targeted watering. Vegetable gardens, flower beds, and fruit trees benefit greatly, as this method delivers water directly to the root zone, reducing waste and preventing overwatering. It’s also perfect for plants that prefer dry foliage, such as tomatoes, peppers, and roses, since it minimizes moisture-related diseases.
Additionally, drip irrigation works well for container gardens, raised beds, and landscaped areas with shrubs or ground cover. If you’re maintaining a garden in a region with water restrictions or dry climates, this system is especially effective in conserving water while keeping plants healthy and hydrated.
How do I adjust my drip irrigation system for seasonal changes or varying weather conditions?
To adjust your drip irrigation system for different seasons or weather conditions, start by considering the water needs of your plants. During hotter months, you may need to increase the watering frequency or duration, while in cooler or rainy seasons, you can reduce it to prevent overwatering.
Make adjustments to the system’s timer or flow controls based on soil moisture levels and plant requirements. For example, many systems allow you to set shorter watering cycles or pause irrigation during rainy periods. Regularly inspect emitters and tubing to ensure they’re functioning properly, especially after extreme weather changes, as freezing temperatures or intense heat can cause damage or clogs.
What should I avoid when setting up or maintaining a drip irrigation system?
To ensure your drip irrigation system works efficiently, avoid these common mistakes:
- Using the wrong type of emitters: Choose emitters based on your plants’ water needs and soil type. Using the wrong ones can lead to overwatering or underwatering.
- Improper spacing of emitters or tubing: Place emitters close enough to cover the root zones without wasting water on unplanted areas.
- Skipping a filter or pressure regulator: Unfiltered water can clog the system, and excessive pressure can damage tubing or emitters.
- Not checking for leaks or clogs: Regularly inspect the system to ensure everything is functioning properly and water is flowing as intended.
By addressing these issues, you can save water, reduce maintenance, and keep your garden healthy and thriving.