Feeling anxious? Yoga can help. These 9 poses combine movement, breathing, and mindfulness to ease stress and promote relaxation. Here’s a quick overview:
- Child’s Pose: Grounding and calming.
- Legs-Up-the-Wall Pose: Relaxing and reduces tension.
- Cat-Cow Stretch: Relieves stress with rhythmic movement.
- Standing Forward Bend: Eases physical and mental tension.
- Bridge Pose: Opens the chest and uplifts your mood.
- Corpse Pose: Deep relaxation for the nervous system.
- Triangle Pose: Improves focus and grounding.
- Seated Forward Bend: Encourages mental calmness.
- Butterfly Pose: Releases tension in hips and pelvis.
Whether you have 10 minutes or 30, these poses can fit into your day and help you feel more balanced. Try them out to lower stress naturally!
Yoga for Anxiety – 20 Minute Practice – Yoga With Adriene
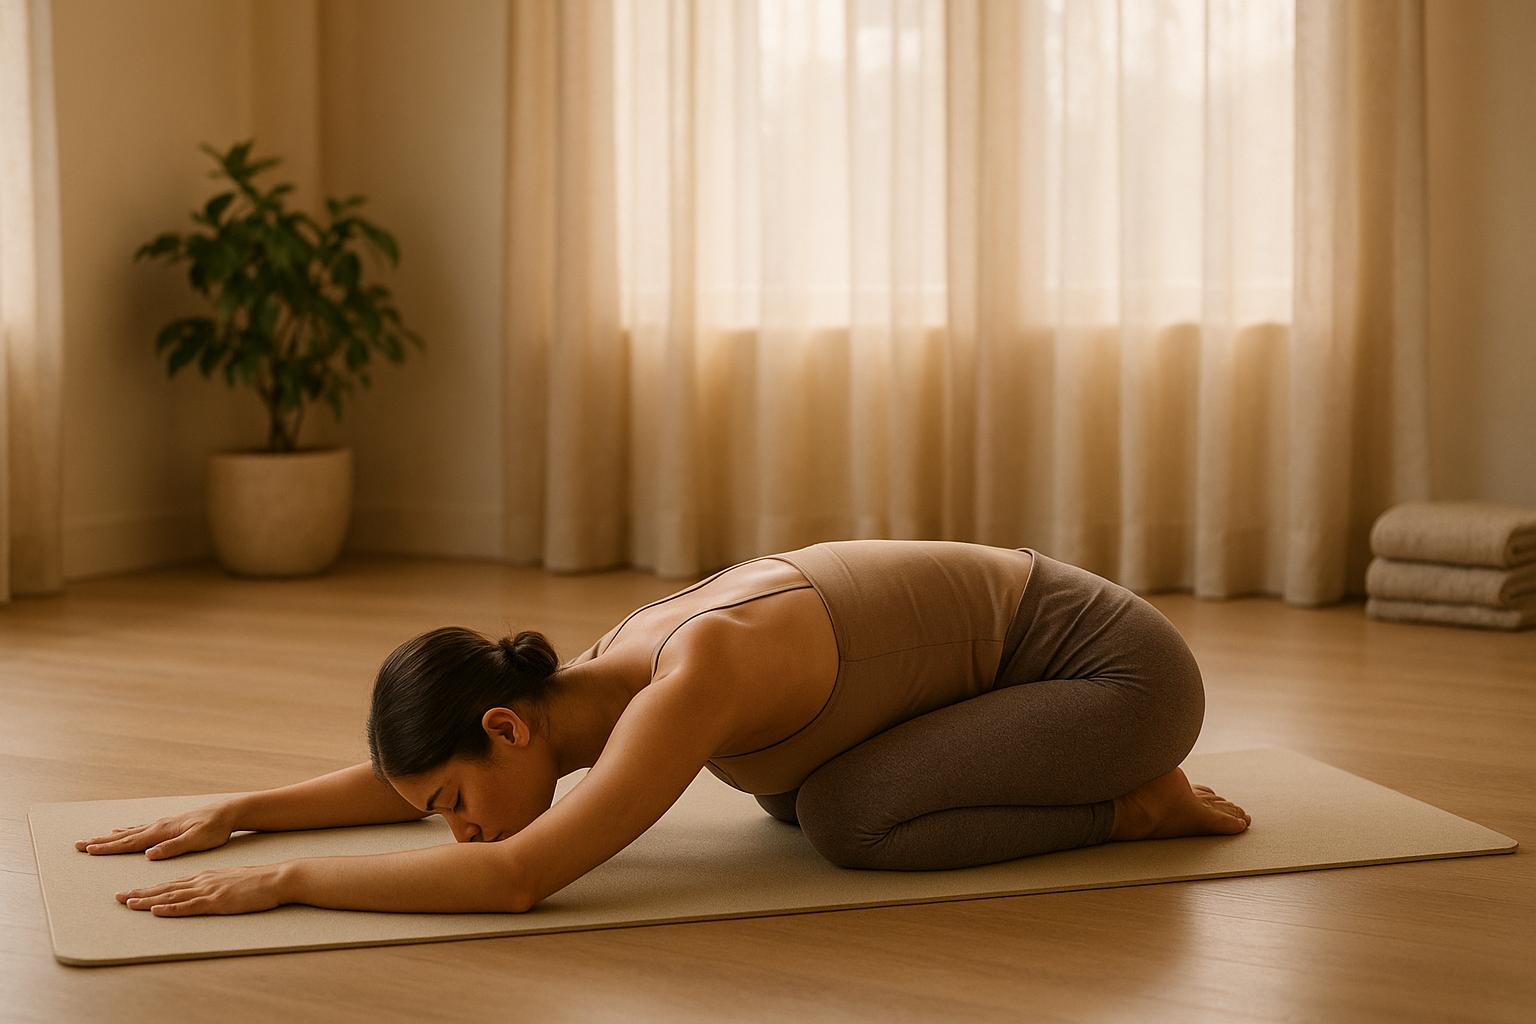
1. Child’s Pose (Balasana)
Child’s Pose offers a gentle, calming way to ease anxiety. This forward-bending posture is simple yet effective, promoting relaxation and a sense of grounding. Let’s break down how this pose works and how to practice it safely for maximum benefit.
Why Child’s Pose Helps with Anxiety
Child’s Pose activates the body’s natural relaxation responses. Resting your forehead on the floor can stimulate the oculocardiac reflex, which may lower your heart rate and create a calming effect. Additionally, the slight chin tuck that occurs in this pose engages the vagus nerve, a crucial component of the body’s "rest-and-digest" system. Dr. Lori Rubenstein Fazzio, Clinical Professor of Yoga and Health at Loyola Marymount University, highlights this:
"Child’s Pose releases these muscles, shifting the body from a sympathetic stress response to a parasympathetic relaxation response."
Valerie Knopik, PhD, a Yoga Medicine® Therapeutic Specialist at Purdue University, elaborates:
"In forward folds such as Child’s, we tend to tuck the chin slightly toward the chest, which is one way to stimulate the vagus nerve, a key to our parasympathetic or rest-and-digest response."
How to Practice Child’s Pose
Here’s how to get into Child’s Pose step by step:
- Start on your hands and knees in a tabletop position.
- Bring your big toes together and sit back onto your heels, keeping your knees hip-width apart or wider for more comfort.
- As you exhale, lower your torso between your thighs, allowing your forehead to rest gently on the floor. Your arms can rest alongside your body with palms facing up, or stretch forward with palms down.
- Gently press your chest toward your thighs and take slow, deep breaths.
- Stay in the pose for 30 to 60 seconds, or longer if it feels right. When you’re ready to come out, extend your arms, engage your core, and inhale as you rise back to a seated position.
Adjustments and Modifications
Child’s Pose can be adapted to suit different needs and body types:
- If resting your forehead on the floor is uncomfortable, use a yoga block or stack your fists under your forehead to reduce strain on your neck.
- For knee discomfort, place a folded blanket or towel under your shins to ease pressure.
- If you’re pregnant or have a larger midsection, widen your knees and consider using blocks under your forehead for extra support.
- If lowering your hips fully onto your heels is challenging, place a bolster or block under your hips for added stability.
As Gina Mandella, Yoga Instructor at Release Well-Being Center, beautifully puts it:
"Child’s pose is the perfect pose to find when you’re overwhelmed or unable to breathe and process… It teaches us to pause and be still to notice where we are hurting or affected. When we notice we can heal."
2. Legs-Up-the-Wall Pose (Viparita Karani)
Legs-Up-the-Wall Pose is a simple yet powerful yoga posture that offers a soothing way to ease anxiety. This gentle inversion requires very little effort, making it an excellent choice for anyone seeking relaxation. By elevating your legs, it helps calm both the body and mind.
Why Legs-Up-the-Wall Pose Eases Anxiety
This pose works wonders for anxiety by engaging the parasympathetic nervous system, which helps shift your body into "rest and digest" mode. This response reduces stress and encourages a sense of tranquility. It also promotes self-reflection and helps ease mental tension, which can lessen symptoms of anxiety. A study even found that nurses practicing restorative yoga, including this pose, experienced reduced occupational stress after just four weeks.
Dr. Robert Saper, MD, MPH, Chair of Wellness and Preventive Medicine, highlights its calming effects:
"Many patients describe anecdotally they find holding the pose is very calming"
How to Practice Legs-Up-the-Wall Pose
To get started, sit sideways against a wall with your knees bent and feet near your hips. As you turn to lie on your back, swing your legs up the wall. Adjust your position so your tailbone is close to the wall for added support. Rest your arms at your sides with palms facing up or place your hands gently on your belly. Relax your shoulders and let your legs naturally rest against the wall.
While in the pose, focus on slow, steady breaths. Hold the position for 2 to 20 minutes, depending on your comfort level. Beginners might start with shorter durations and gradually increase over time. When you’re ready to come out, push yourself gently away from the wall, relax on your back for a moment, then draw your knees toward your chest. Roll onto your side before sitting up slowly.
If you feel any discomfort, try some simple adjustments.
Adjustments for Added Comfort
This pose can be tailored to suit your needs, ensuring maximum relaxation. If your legs start to feel tingly or numb, bend your knees toward your chest for a moment before extending them again. Alternatively, move your torso slightly farther from the wall. For extra support, place a cushion, folded blanket, or bolster under your hips. You can also add a pillow under your head or between your knees for added comfort.
If transitioning to the floor feels challenging, try the Legs-Up-the-Chair variation. Lie on your back and rest your calves on a chair seat. This version offers similar benefits without putting strain on your lower back.
Dr. Saper emphasizes the benefits of this gentle inversion:
"The advantage of legs up the wall compared to a headstand or shoulder stand is that you’re able to achieve the benefits of inversion without stressing or straining your neck and head."
Peloton yoga instructor Anna Greenberg also shares her perspective:
"Legs Up the Wall is especially nice after a long day of sitting, standing, or traveling. You can do it anywhere for a refresh if you’re feeling stiff, stale, or stressed"
For those with tight hamstrings, bending your knees or moving slightly farther from the wall can help you find a comfortable position. These modifications allow you to fully enjoy the calming effects of the pose while adapting it to your body’s needs.
3. Cat-Cow Stretch (Marjaryasana-Bitilasana)
Following the earlier poses designed to promote relaxation, the Cat-Cow Stretch introduces a gentle flow that calms the mind while energizing the body.
This movement is all about warming up the spine and improving flexibility in the back. By alternating between an arched and rounded position, it stretches the back, neck, and torso while giving your abdominal organs a light massage. When you pair these movements with intentional breathing, this sequence becomes a fantastic way to ease stress and restore mental clarity.
Why Cat-Cow Stretch Helps Quiet the Mind
Synchronizing breath with movement is key to shifting from a stressed "fight-or-flight" state to a relaxed "rest-and-digest" mode. The rhythmic motion of the spine, combined with deep breathing, helps reduce anxiety, sharpen focus, and lift your mood by increasing oxygen flow. Research backs this up. A 2018 study showed that women practicing Hatha yoga three times a week for a month experienced notable reductions in stress, depression, and anxiety. Similarly, a 2020 study highlighted how yoga stretches can lower cortisol levels and activate the parasympathetic nervous system.
Peloton instructor Nico Sarani shares her perspective on this pose:
"I love Cat Cow because it’s a perfect (and gentle) warmup for the spine, be it in prep for a yoga sequence or another workout. That’s why I frequently use it in my warm-up segments in yoga. But I also do it before lifting weights, and sometimes at the end of the day if I feel like getting some evening mobility in before I head to bed."
How to Practice Cat-Cow Stretch
- Start on All Fours: Position yourself on your hands and knees. Make sure your wrists are aligned under your shoulders and your knees are directly under your hips. Your fingers should point forward, and your shins should be hip-width apart. Keep your head neutral, with a soft gaze.
- Cow Pose: As you inhale, drop your belly toward the mat, lift your chest and chin, and gaze upward. Open up across your shoulder blades and move your shoulders away from your ears.
- Cat Pose: On the exhale, draw your belly toward your spine and round your back toward the ceiling, like a stretching cat. Let the crown of your head lower gently, avoiding any strain on your neck.
- Flow with Your Breath: Continue transitioning between Cow and Cat poses, keeping your movements in sync with your breath. Repeat this flow 5 to 20 times, then rest by sitting back on your heels with an upright torso. Focus on slow, intentional exhales to deepen your relaxation.
Breathing Tips and Modifications
Let your breath guide your movements. Imagine your breath traveling along your spine, and if your mind starts to wander, gently redirect your focus to the rhythm of your breath. This mindfulness cultivates a sense of calm and encourages positive thought patterns.
The Cat-Cow Stretch can be adjusted to suit different needs. For sensitive wrists, try placing a folded blanket under your knees, using yoga blocks, making fists, or resting on your forearms for extra support.
If getting on all fours is difficult, here are some alternatives:
- Standing Variation: Stand with feet hip-width apart, bend your knees slightly, and place your hands on your thighs.
- Seated Variation: Sit near the edge of a chair with your feet flat on the ground and rest your hands on your knees.
For those with neck issues, keep your head aligned with your torso to avoid straining your neck. Pregnant individuals or those with back injuries should focus on a modified Cow Pose, keeping the spine neutral to prevent unnecessary stress on the lower back.
4. Standing Forward Bend (Uttanasana)
Standing Forward Bend is a gentle inversion that helps quiet the mind and ease physical tension. It naturally builds on the calming effects of earlier poses, making it a staple in many yoga practices.
This pose stretches the spine, hamstrings, and calves while encouraging you to focus inward. By shifting your attention to your breath and body, it becomes easier to step away from anxious thoughts and find a sense of calm.
Why Standing Forward Bend Helps You Relax
Uttanasana works wonders for calming the mind by breaking the cycle of anxious thinking. The forward fold naturally invites a meditative state, helping you feel more grounded.
"Uttanasana will wake up your hamstrings and soothe your mind." – YJ Editors
As your head hangs down, you might notice tension melting away from your shoulders and spine, leaving you with a greater sense of ease.
How to Practice Standing Forward Bend
- Start in Mountain Pose: Stand with your feet hip-width apart, firmly rooted to the ground.
- Exhale and fold forward: Hinge at your hips, keeping your back flat rather than rounding it. Imagine your chest reaching toward your thighs.
- Modify as needed: Bend your knees if necessary and use blocks or place your hands on your legs for support.
- Relax your head and neck: Let your head hang freely toward the floor, releasing any tension in your upper body.
- Hold the pose: Stay here for 4–8 breaths. On each inhale, press your belly gently into your thighs, and on each exhale, deepen the stretch.
- Return to standing: To come out of the pose, bend your knees slightly, keep your back straight, and inhale as you sweep your arms out to the sides and rise back to Mountain Pose.
Adjustments for Comfort and Safety
Adapting Uttanasana to suit your body ensures a calming and safe experience. If your hamstrings feel tight or balancing is tricky, bend your knees more deeply or use a wall for support. Struggling to reach the floor? Place blocks under your hands or rest them on a chair. For those with back sensitivities, try a halfway lift by keeping your back straight and your head lifted until you’re ready for the full fold.
5. Bridge Pose (Setu Bandhasana)
After the soothing forward folds, Bridge Pose offers a gentle backbend that helps ease anxiety while adding a touch of energy to your practice.
This pose opens up the chest and helps counteract tension caused by stress. Unlike the inward motion of forward folds, Bridge Pose encourages an uplifting movement by lifting the hips. This creates a balance between calming and energizing effects, helping to shift your mental state into a more positive space.
It’s also great for your body. Bridge Pose strengthens the back, glutes, and hamstrings while stretching tight areas like the chest, neck, and spine. Plus, the slight inversion improves circulation to the spine and brain, promoting a refreshed and clear mind.
Why Bridge Pose Eases Anxiety
Bridge Pose does more than stretch muscles – it actively works against the physical and emotional effects of anxiety. The chest-opening movement promotes feelings of openness, joy, and confidence, which anxiety often suppresses. As you lift your hips and expand your chest, you’re reversing the hunched, closed-off posture that stress tends to create.
"Feeling anxious? 🌿 Bridge Pose (Setu Bandhasana) is your go-to for calming the mind and releasing stress. 💚 Strengthen your back and find peace by practicing 2-3 times daily." – Siddhi Yoga International
How to Practice Bridge Pose
- Set up the pose: Start by lying on your back with your knees bent and feet flat on the mat, about hip-width apart. Keep your feet close to your glutes. Rest your arms alongside your body with palms facing down.
- Lift into the pose: Engage your core and legs. As you inhale, press firmly through your feet and lift your hips, leading the movement from your pubic bone rather than your navel to protect your lower back.
- Stabilize: Press your upper arms into the mat, clasp your hands beneath you, and firm your thighs to maintain alignment.
Hold the pose for 30 seconds to a minute, breathing deeply and steadily. To release, exhale, unclasp your hands, and slowly lower your back to the mat, one vertebra at a time.
Adjustments to Fit Your Needs
Bridge Pose can be tailored to suit your comfort and experience level. If your back feels weak or you want a more restorative version, place a yoga block or folded towel under your sacrum for added support. To engage your inner thighs more, try squeezing a block between your legs during the pose.
Safety tips: Avoid this pose if you have neck or shoulder injuries, and always keep your gaze straight up – don’t turn your head while in the pose. If you’re pregnant, have high blood pressure, or experience vertigo, it’s best to skip this one.
sbb-itb-593149b
6. Corpse Pose (Savasana)
After the invigorating energy of Bridge Pose, Savasana offers a chance to fully let go, allowing your body and mind to absorb the benefits of your practice.
At first glance, Savasana might seem like the easiest yoga pose – it’s just lying down, right? But stillness can be surprisingly challenging. This pose invites you to release every ounce of tension in your body while your mind settles into a state of quiet observation. It’s where the nervous system shifts gears, moving from stress to recovery.
The beauty of Savasana is in its simplicity. You’re not doing anything – you’re just being. This stillness creates the perfect space for reducing anxiety, as it activates the parasympathetic nervous system, which is all about rest and recovery.
Why Corpse Pose Eases Anxiety
Savasana is a powerful way to counteract the effects of anxiety. When stress takes over, your body often stays locked in "fight or flight" mode, driven by the sympathetic nervous system. Savasana flips the switch, activating the parasympathetic nervous system to promote relaxation and healing.
Research backs up its calming effects. A study published in the International Journal of Yoga found that Savasana significantly lowers stress markers like heart rate and blood pressure. Another study in the Journal of Clinical Psychology highlighted how mindfulness-based practices, including Savasana, can reduce symptoms of anxiety and depression. Additionally, decreased cortisol levels – the stress hormone – have been observed in those who regularly practice this pose.
"Savasana is a powerful tool for stress management. By activating the parasympathetic nervous system, it helps to calm the mind and body, thereby reducing stress and anxiety."
– Arogya Yoga School
This pose is the ultimate reset for both mind and body, leaving you with a sense of calm that lingers long after your practice ends.
How to Practice Corpse Pose
Start by lying flat on your back. Stretch your legs out straight, letting them relax and fall open naturally. Your arms should rest at your sides with palms facing up. Tuck your shoulder blades gently under you, allowing your chest to open softly.
If you need extra support, feel free to use props. A blanket under your neck, a pillow beneath your knees, or an eye pillow can make the pose more comfortable. The goal is to eliminate any physical distractions so you can fully relax.
Close your eyes and take a few deep breaths, noticing the rise and fall of your chest and belly. Then, let your breathing return to its natural rhythm. Slowly scan your body from head to toe, consciously releasing tension in each area – your feet, calves, thighs, pelvis, abdomen, chest, shoulders, arms, hands, neck, face, and scalp.
The hardest part? Quieting your mind. It’s natural for thoughts to pop up. When they do, simply acknowledge them and gently bring your focus back to your breath or body sensations.
Tips for Staying Present
If your mind starts to wander, try these techniques to stay grounded during your 5 to 10 minutes of stillness:
- Focus on your breath: Pay attention to the natural flow of your breath. You can count each inhale and exhale or just notice how it feels as it moves through your nose.
- Feel your connection to the mat: Bring awareness to the points where your body touches the ground – your heels, calves, back, shoulders, and head. This grounding helps anchor your mind in the present.
- Subtle movements: If restlessness creeps in, try lightly tapping your thumb to each fingertip, one at a time. This small motion can help refocus scattered thoughts.
- Repeat a mantra: Use a simple phrase like "I am calm" or "I am here" to give your mind something to hold onto when it starts to drift.
"The real challenge of Corpse Pose is letting go: Allowing yourself to relax and becoming a passive observer of your body and mind."
– Alo Moves
When your time in Savasana feels complete, begin to reawaken your body. Wiggle your fingers and toes, then roll gently onto your right side, pausing in a fetal position. When you’re ready, push yourself up to a seated position, keeping your eyes closed. Take a few deep breaths before slowly opening them, carrying this sense of calm into the rest of your day.
7. Triangle Pose (Trikonasana)
Triangle Pose brings you back to standing with a sense of strength and focus, helping to ground your body and mind. This pose blends stability, flexibility, and balance, redirecting restless energy into a more focused and steady state. It also opens up areas in the body where tension often hides.
Why Triangle Pose Helps Calm Anxious Energy
This pose works on several levels to ease an anxious mind. By activating the parasympathetic nervous system, it can reduce stress and anxiety while encouraging relaxation. Focusing on balance and alignment during the pose naturally shifts your attention away from worries. As Peloton instructor Kristin McGee notes:
"We are uniting our mind and body through movement and our breath, which can have a very calming effect on the nervous system… Yoga challenges us in a way that focuses us and keeps us present, so we get less anxious about the past or the future."
Triangle Pose also connects to the root chakra (Muladhara), which symbolizes stability and grounding. This connection can foster a sense of being anchored and secure.
How to Practice Triangle Pose
Here’s how to perform Triangle Pose effectively:
- Step 1: Stand with your feet about 3.5 to 4 feet apart. Turn your right foot out 90° so it points toward the front of your mat, and angle your left foot inward by about 15°. Align the center of your right heel with the arch of your left foot.
- Step 2: Press both feet firmly into the ground, distributing your weight evenly. This grounding action supports stability and helps calm anxious energy.
- Step 3: Take a deep breath. As you exhale, hinge at your hips and tilt your upper body to the right, keeping your waist long and straight. Your left hand will naturally extend upward, while your right hand reaches downward.
- Step 4: Rest your right hand wherever it feels comfortable – on your shin, ankle, or the floor outside your right foot. Avoid pushing the stretch too far. As Peloton instructor Kirra Michel advises:
"The integrity and length of your spine is much more important than touching the ground."
- Step 5: Stretch your left arm toward the ceiling, creating a straight line from your left fingertips to your left foot. Keep your chest and pelvis open, as if you’re positioned between two flat panes of glass.
Tips for Safe and Effective Alignment
Proper alignment ensures you get the most out of Triangle Pose while staying safe:
- Engage your front thigh muscles to keep the front knee soft and supported. This helps prevent strain and keeps you steady.
- Focus on maintaining a long spine as you reach forward. If reaching the floor feels uncomfortable, use a yoga block under your bottom hand or rest your hand on your shin. As Peloton instructor Mariana Fernández says:
"Whether you have a beginner or advanced practice, props are always a good idea to use for alignment in Triangle Pose."
- Keep your head aligned with your spine. If looking up at your top hand strains your neck, gaze at the floor or keep your head in a neutral position.
Hold the pose for 10 to 30 seconds, breathing deeply and steadily. With each exhale, let your body relax further into the stretch while keeping your foundation strong. This combination of mindful breathing and awareness helps you stay present, naturally easing anxious thoughts.
To come out of the pose, inhale and press through your feet to return to standing. Straighten your feet, then switch sides. Repeat the pose 3 to 6 times on each side, balancing the grounding effects with a sense of openness. These mindful transitions can help you seamlessly weave grounding poses into your practice.
8. Seated Forward Bend (Paschimottanasana)
Following the grounding benefits of Triangle Pose, Seated Forward Bend takes things further by encouraging a deeper inward focus and a sense of calm. This pose stretches the entire back body – from the spine to the hamstrings and calves – while also promoting mental tranquility and easing stress.
Why Seated Forward Bend Helps Ease Anxiety
Seated Forward Bend works as a natural way to ease anxiety by encouraging the flow of energy throughout the body, which fosters relaxation and reduces tension. The forward-folding motion creates a grounding sensation, helping to quiet restless thoughts and reinforce a sense of purpose. Studies have shown that even one session of hatha yoga can significantly reduce feelings of stress, anxiety, and depression.
This pose also has a calming effect on the nervous system. Yoga teacher Barbara Benagh explains:
"This surrendering practice with every exhalation helps release a little tension, bringing the brain and heart to a restful state. This stops inner agitation by soothing the nerves and calming the mind."
How to Practice Seated Forward Bend
- Start in Staff Pose (Dandasana) with your legs extended, spine straight, and shoulders relaxed.
- Inhale deeply, lifting your arms overhead to lengthen your spine.
- Exhale and hinge forward at the hips, keeping your spine straight as you fold toward your toes.
- Flex your feet and engage your quadriceps to protect your hamstrings and provide stability.
- Reach for your toes, or if that’s not accessible, rest your hands on your shins or thighs. Avoid forcing the stretch.
- Lower your head slightly and take deep breaths, focusing on lengthening your spine as you inhale and deepening the stretch as you exhale. Hold for 1 to 3 minutes.
- To release, slowly lift your torso back to the starting position. Repeat the pose two or three times if desired.
Modifications to Fit Your Needs
Seated Forward Bend can be adapted to accommodate different levels of flexibility and comfort:
- Tight hamstrings? Sit on the edge of a folded blanket to elevate your hips, or place a rolled blanket under your knees for extra support.
- Can’t reach your toes? Use a yoga strap around your feet. Hold the strap ends and gently pull while keeping your feet flexed.
- Knee discomfort? Place a blanket or flat pillow under your knees, or slightly bend them to ease the stretch.
You can also hold onto your feet, ankles, or calves – whatever feels comfortable – while keeping your spine straight and shoulders relaxed. Benagh offers this valuable insight:
"Notice the mental patterns present during the pose. Redirect your attention to the sensations of letting go. As you deepen your pose by doing less, you may recognize how emotions stored in the body can mimic physical inflexibility."
As you hold the pose, focus on your breath and the sensations in your body. If your mind starts to wander, gently bring your attention back to your practice. This mindful approach turns Seated Forward Bend into more than just a stretch. It becomes a powerful tool to calm the mind and ease anxiety – a meaningful step in your journey toward a balanced and peaceful yoga routine.
9. Butterfly Pose (Baddha Konasana)
Wrapping up this anxiety-relief sequence, the Butterfly Pose is a perfect way to release tension in your hips and pelvis. Also called Bound Angle Pose or Cobbler’s Pose, this seated posture helps create a sense of openness in areas where stress and anxiety often build up, making it a calming and grounding way to end your practice.
Why Butterfly Pose Eases Anxiety
Butterfly Pose works wonders for both the body and mind. By opening up the hips and pelvis, it helps release tension that tends to gather in these areas. When paired with slow, mindful breathing, it soothes the nervous system and quiets those swirling thoughts. This pose also connects to the Sacral Chakra, located in the lower abdomen, which is associated with emotional balance and stability.
There’s research to back up its calming effects. For example, a study found that women with chronic pelvic pain who practiced yoga, including Butterfly Pose, twice a week reported less pain and improvements in emotional well-being and daily activities. Another six-week program combining yoga and meditation showed significant reductions in anxiety and stress while boosting mindfulness.
How to Do Butterfly Pose
To get started, sit tall with your spine straight. Extend your legs out, then bend your knees and bring the soles of your feet together. Hold your feet or use your hands for support.
Bring your heels closer to your groin, but don’t force it – comfort is key. Inhale deeply, and as you exhale, lean forward slightly while pressing your thighs and knees downward. You can gently flap your legs up and down, starting slowly and keeping your breath steady. After about 60 seconds, slow the motion and pause.
Take another deep breath, and on your next exhale, fold forward a bit more. Keep your chin lifted and your spine straight. For a deeper stretch, press your knees toward the floor using your elbows. Beginners can hold this position for 30 seconds to a minute, while more experienced yogis might stay in the pose for 3 to 5 minutes.
When you’re ready to come out of the pose, inhale as you lift your torso upright, then exhale and extend your legs forward to relax.
Modifications for Comfort
Butterfly Pose can be easily adapted to suit different needs and flexibility levels. Sitting on a cushion or folded blanket can elevate your hips and help maintain good posture, especially if your hips feel tight. If your knees or thighs don’t naturally drop toward the floor, place yoga blocks or cushions underneath for support. For those needing extra back support, sitting against a wall can help keep your spine aligned.
Always listen to your body. As Denis Morton wisely says:
"Start where you are and back off if you feel pain."
Yoga teacher Wendy Cope also advises:
"Find where your body feels a slight tug of resistance… That initial tug is known as the Golgi Tendon Organ Response, an early alert system to let the body know that it’s in danger of injury. Don’t push past this initial tug. Instead, hang out there for a few breaths; you’ll feel the muscles relax and allow you to drop down deeper into the stretch."
To maximize the calming benefits, focus on slow, deep breaths and make sure your weight is evenly distributed across your hips, pelvis, and sitting bones. If you notice yourself leaning to one side, take a moment to adjust and center yourself.
Butterfly Pose is the perfect way to end your anxiety-relief routine. It offers not just physical relaxation but also emotional release, combining mindful breathing with gentle stretching to help you process anxious feelings and find a sense of inner peace.
Building Your Anxiety-Relief Yoga Routine
Crafting a yoga routine to ease anxiety doesn’t have to be complicated. The main goal is to find a rhythm that suits your lifestyle and stress levels – and then stick with it. Dr. Leela Magavi, Psychiatrist and Regional Medical Director for Mindpath Health, emphasizes the importance of consistency:
"Much like training for your body, consistency and repetition can train your mind."
Choosing Your Practice Time
The best time to practice yoga is whenever you can commit to it regularly. If mornings work for you, they’re a great time to set a peaceful tone for the day. Gentle poses like Child’s Pose or Cat-Cow Stretch can help loosen stiffness and wake up your body. If evenings fit better, yoga can be an excellent way to unwind after a long day – your body might even feel more flexible after being active. As B.K.S. Iyengar wisely observed:
"Practice in the morning makes one work better at one’s vocation. In the evening it removes the fatigue of the day’s strain and makes one fresh and calm."
Experiment with morning and evening sessions to see what feels more sustainable for you.
Structuring Your Routine
Your yoga practice can be short and sweet or a longer, more immersive session. A quick 10–15 minute routine with three or four poses, such as Cat-Cow or Standing Forward Bend, can work wonders for calming a busy mind. If you have more time, a 30–45 minute session lets you explore most or all of the nine poses in depth, giving you the chance to fully relax into each posture and focus on your breath.
Recommended Hold Times
Here’s a guide to how long you might hold each pose. For some, like Cat-Cow Stretch, Bridge Pose, and Butterfly Pose, the emphasis is on mindful movement rather than holding a static position.
| Pose | Suggested Duration |
|---|---|
| Child’s Pose (Balasana) | Beginners: 1–2 minutes; Experienced: up to 5 minutes |
| Legs-Up-the-Wall (Viparita Karani) | Beginners: 3–5 minutes; Experienced: up to 10 minutes |
| Standing Forward Bend (Uttanasana) | Up to 1 minute (adjust as needed) |
| Triangle Pose (Trikonasana) | Beginners: about 30 seconds per side; Experienced: up to 1 minute per side |
| Seated Forward Bend (Paschimottanasana) | Beginners: 1–2 minutes; Experienced: up to 5 minutes |
| Corpse Pose (Savasana) | Aim for 10–20 minutes |
For poses like Cat-Cow Stretch, Bridge Pose, and Butterfly Pose, move at a pace that feels natural, focusing on deep, steady breaths. These guidelines can help you tailor your practice to your needs.
Building Your Flow
Start with simpler variations of poses and gradually work toward more challenging ones if it feels right. If relaxation is your priority, slower practices like restorative or Yin yoga can help calm your mind. On days when you feel restless or tense, a slightly faster-paced sequence can help release built-up energy before transitioning into more soothing poses. Always end with Corpse Pose to let your body and mind absorb the benefits of your practice.
Making It Sustainable
To make your routine last, focus on poses that consistently help you feel grounded and calm. Some days, a gentle hip opener like Butterfly Pose might be just what you need, while on others, the soothing inversion of Legs-Up-the-Wall could be more effective. Yoga doesn’t have to be limited to a set schedule – taking a moment for Child’s Pose during a stressful workday or doing a few Cat-Cow stretches before bed can make a big difference.
The ultimate goal is to create a practice you can rely on whenever anxiety starts to creep in. Over time, these poses can become a powerful way to calm your mind and body, helping you build resilience and find balance in your day-to-day life.
Conclusion
These nine yoga poses combine movement, deep breathing, and mindfulness to help ease anxiety naturally. Dr. Corinna Keenmon, the medical director of psychiatry and telepsychiatry at Houston Methodist, highlights this unique blend:
"Yoga seems to have this powerful combination of the physical movement combined with the deep breathing, meditation and mindfulness aspect…Plus, the cognitive and emotional improvements that happen over time are priceless."
Studies have shown yoga can significantly reduce symptoms of anxiety and depression, with controlled research reporting measurable improvements. By stimulating the parasympathetic nervous system and increasing GABA levels, even a short 10-minute session can help alleviate anxiety and enhance your mood.
This growing body of evidence emphasizes yoga’s potential as a valuable tool for mental well-being. While it works best alongside professional mental health care, its benefits are undeniable. As Katharina Star, PhD, who specializes in anxiety counseling, explains:
"Meditation, visualization, and focusing on breathing can help with letting go of worry and fear. The overall practice of yoga can elicit the relaxation response, allowing both the body and mind to gain a sense of calm and ease."
Whether you’re managing occasional stress or more persistent anxiety, these poses can serve as dependable tools in your self-care routine. One of yoga’s greatest strengths is its adaptability – you can practice it anywhere and anytime you need to find balance and tranquility.
For more insights and practical tips on wellness, visit Inspiretopics. Incorporate these poses into your daily life to build resilience and maintain calm in the face of anxiety.
FAQs
How often should I do these yoga poses to help ease anxiety?
To feel the calming effects of yoga, try practicing these poses 2–3 times a week, dedicating about an hour to each session. If your schedule is tight, even carving out 10–15 minutes a day can help. The secret lies in staying consistent – find a routine that works for you and make it a regular part of your life to enjoy the benefits.
What precautions should I take when practicing these yoga poses if I have a medical condition?
Yoga offers numerous advantages, but if you’re managing a medical condition, it’s essential to approach your practice with care to avoid any unnecessary risks. For instance, individuals with high blood pressure should steer clear of poses that elevate the legs above the heart, such as inversions, as these can increase pressure in the head and neck. Similarly, those dealing with glaucoma or severe migraines should avoid headstands or shoulder stands, as these positions might exacerbate symptoms.
For people with chronic conditions like arthritis or chronic fatigue syndrome, certain poses could potentially worsen discomfort or fatigue. Before beginning yoga, it’s always a good idea to consult with your healthcare provider to ensure the practice is safe for your specific needs. Working with a knowledgeable yoga instructor can also be incredibly helpful – they can guide you in modifying poses to align with your abilities and any physical limitations.
Can beginners or people with limited flexibility try these yoga poses for anxiety relief?
Yoga offers a welcoming space for everyone, regardless of experience or flexibility. Many poses can be modified to suit beginners or those who might need a little extra support. For example, using props like cushions, blocks, or blankets can make poses like Pigeon Pose more accessible, helping you maintain alignment while staying comfortable. Gentle movements like Child’s Pose or Cat-Cow are also excellent starting points, as they’re easy to adjust based on your comfort level.
What’s great about yoga is that it’s not about perfection – it’s about finding what feels good for you. This makes it a fantastic tool for easing anxiety, as it promotes relaxation and mindfulness without pressuring you to nail every pose. Take your time, listen to your body, and tweak the practice to fit your needs.